Rode VideoMic Go 2 for more flexibility
External microphones are essential for improving the sound quality of video recordings. Even a simple VideoMic from Rode improves the audio quality considerably.
Introduction
 I’ve been using the Rode VidoMicro for video recording for quite some time, both on system cameras and smartphones. Because of the orientation of the microphone, you get better audio quality on video than with built-in microphones, although it has to be said that even built-in microphones are getting better. In search of a better alternative, I had already tried the TakStar SC600 once. But here the difference was too small and the gain control was hardly usable.
I had the Rode NTG all the time on the wish list, but I was bothered by the rather high price and the built-in battery. But in early February, Rode announced the VideoMicro Go 2, which looks confusingly similar to the Rode NTG except for the size.
I compared the Rode VideoMic Go 2 and the Videomicro once and recorded a short video about it:
Equipment
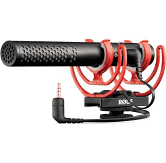
 After the expected delivery problems here in Europe, I ordered it at the beginning of February. And the microphone really looks like the smaller brother of the NTG. But it has no built-in battery, so it might need power from the camera or the Zoom H1n and it has no gain control.
Instead, it has 2 ports, the regular phone jack and a USB-C port.
Unlike the NTG, it is not a universal connection cable that allows connection to the camera or smartphone. It is only a TRS cable. If you want to connect the microphone to a smartphone, you need TRRS and have additional costs.
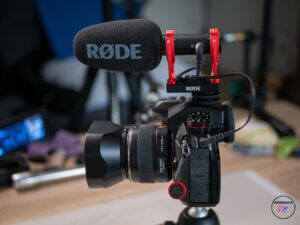
Otherwise, the same shockmount was installed here as in the NTG. It can also be moved if necessary, so that you can look through the viewfinder even with the microphone on. A thread is embedded in the bottom of the cold shoe, so you can mount the microphone directly on most tripods.
The USB-C port
 The real flexibility of this microphone comes from the USB-C connector. This allows the microphone to be used on PC, MacBook or tablets with the appropriate connection. For example, the microphone is easily recognized as an external microphone under Windows and can then be used in OBS, Audacity or in Da Vinci Resolve.
A
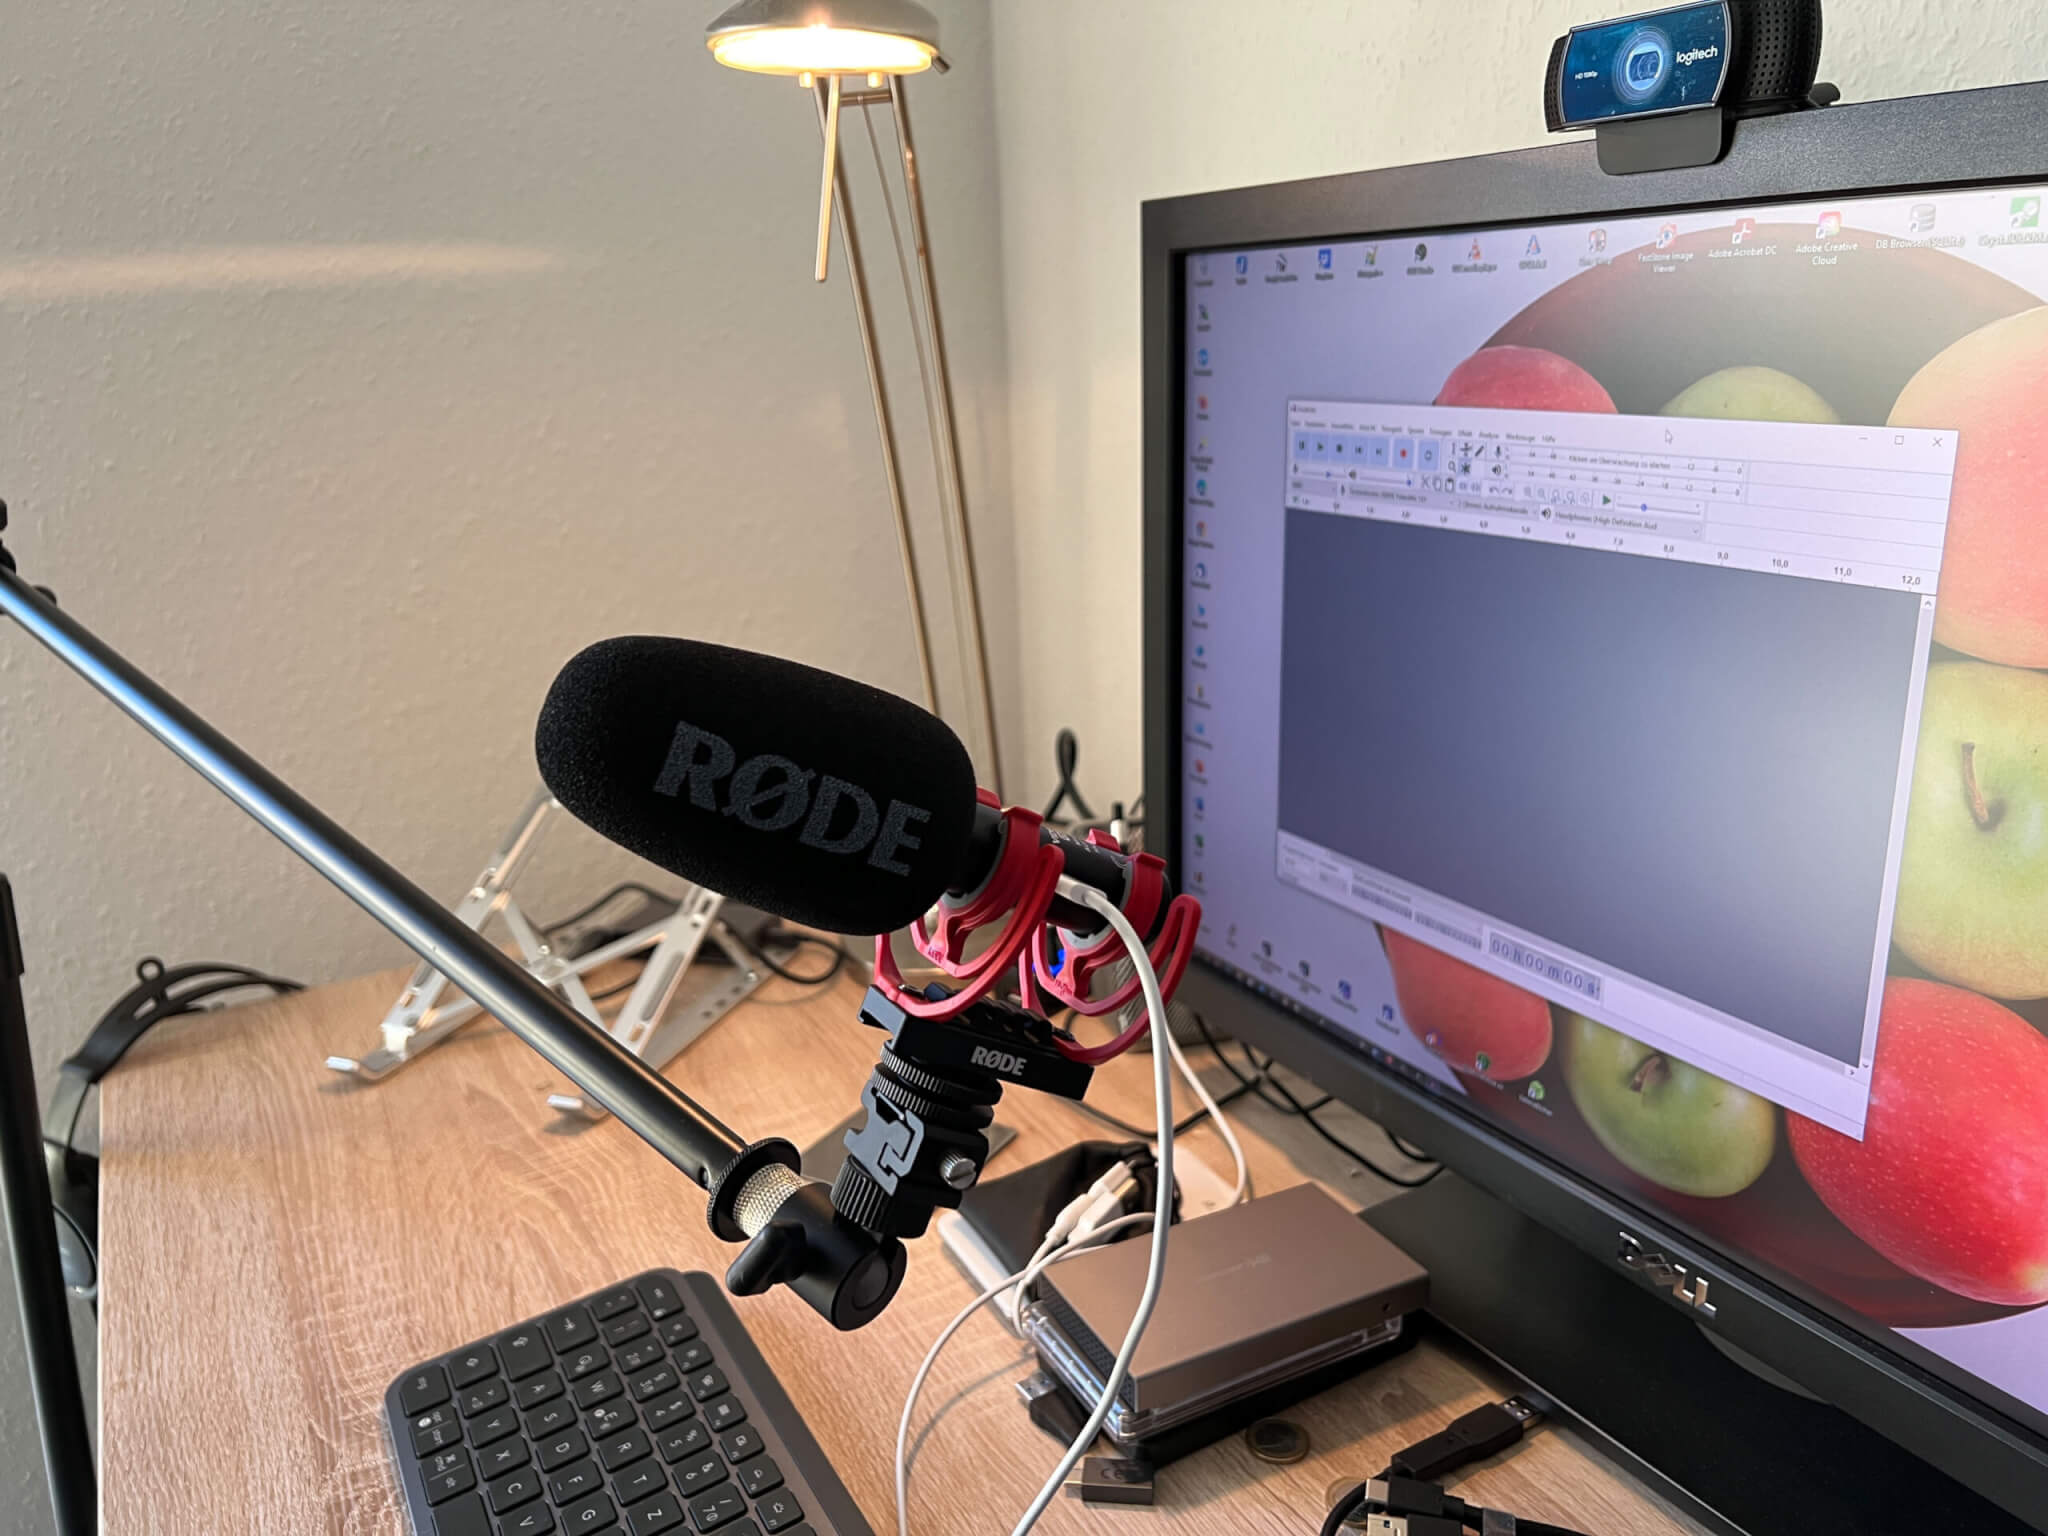
But it is not only recognized as an input device, but also as an output device. And this is where the jack connector comes into play again. It functions as an output option for monitoring when the device is connected via USB-C.
You can listen to your recording (monitor) or play audio files without delay.
Connecting to an iPad or under Windows is no problem, you certainly have a USB-C to USB-C or USB-A cable in your collection. I used the charging cable from my iPad Air, for example, which worked wonderfully.
Connection to an Smartphone
 As mentioned, the microphone only comes with a cable that allows you to connect it to a camera or recorder (TRS connector). If you want to connect the microphone to a smartphone you need either the Rode SC-7, which you can plug in directly, or a TRS to TRRS adapter, e.g. Rode SC4). These are cables around the 10, – €.
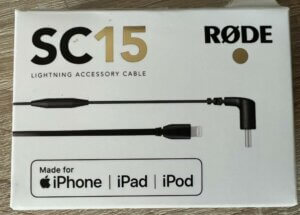
The same applies to the Iphone, where you also need the Apple Lightning to headphone cable. This allows you to operate the microphone on the iPhone.
But if you want to use the USB-C port for the iPhone or iPads with Lightning connector, then you need the Rode SC-15, and that costs just under 25, – €. I tried other cables, but they didn’t work. And that feel a little bit as a rip-off, about 10,– € would have been okay, but just under 25,– €? But why would you want to connect the Rode VideoMic Go 2 via USB-C when it works the same way?
The Rode Central App
The app is available for Windows, Mac and also iOS and Android. This app allows you to record but also control various Rode microphones, including the VideoMic Go 2.
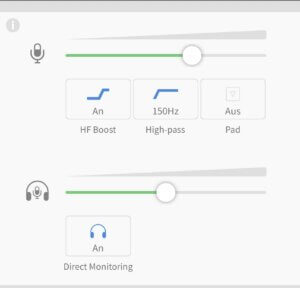
And here comes the decisive advantage of the Rode VideoMicro Go 2 when connected via USB-C, you can control/activate various settings via the app, which are also available on the Rode VideoMic NTG.
Thus, a boost of the higher frequencies can be switched on here, which is intended, among other things, to compensate a little for the changes due to the windshield.
Or I can use a filter, either for 75 or 150 Hz, and I can activate a pad that records at -20 dB. And of course the volume of the monitoring output for headphones can be controlled.
 Of course, these settings only work when connected via USB-C, while the more expensive VideoMic NTG has physical buttons on the microphone for this purpose. On the other hand, the settings made in the Rode Central app are retained even when the device is changed. I can make the settings on a Windows PC and they are available to me on the phone if I do not want to change them.
Conclusion
The Rode VideoMicro Go 2 was me for exactly the intermediate step I was looking for. Also, microphone is more directional than the VideoMicro, which also suits me just fine. In direct comparison, I feel it is clearer, although the difference here is not so great.
In any case, the VideoMic Go 2 delivers more power, because I can set the level to -12 dB on my Lumix cameras and get clean recordings.
And the difference is also in flexibility is worth the price of just over 100,– €, even if I find the price for the Lightning cable outrageous, but it works.
ciao tuxoche


