Lightroom presets as a starting point for your processing
Lightroom presets as a starting point for your processing tries to pose pros and cons of presets.
Introduction
Presets for image processing are arround for quite some time now, and Lightroom itsselfs installs a couple of presets and of course you can buy or freely download additional presets for b/w, landscape or portrait shooting in the internet.
Those presets can be applied to an image as a first step in development module as a base for further image processing. Development presets or at least one can also aplly to one or more images during the import process.
Define your own preset
 Instead of downloading or even buying presets how about makeing one of your own as a first step. A presets apllies certain fixed values to an image. Defining a preset which add +10 on saturation and takes down the hilights by -20 will apply those values to all pictures where the preset is added to. Ant this behavior is one of the major limitation of presets, they don’t work individual depending on the image.
There are only two exceptions to this rule. The first one is the lens correction, which corrects chromatic abberation and vignetting based upon the data in the lens profile. If you make your own preset to apply lens corrections to the image and this preset is defined with a picture lets say captured with a 24-70mm lens it will apply the correct values according to the lens profile for an image taken with a 70-200mm zoom lens. The values are applied to the picture dynaically.
The second exception is the auot tone correction, which was introduced in Lightroom 6. The auto tone correction changes the values for the hilights, shadows and exposure, but in most cases the resulting image is to bright too me.
We could define a preset which applies the auto tone corrections to all images during an import session.
To define a new preset just click on the ‘+’ sign on the right hand side in the development module and you’ll get the follwoing dialog:
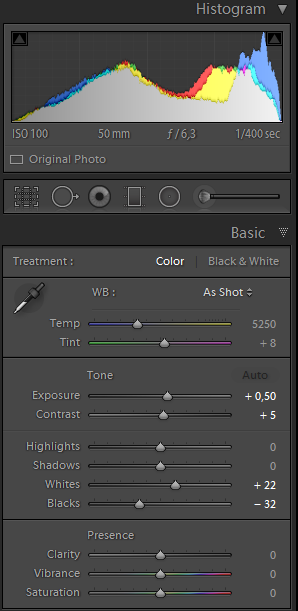
 To activate the auto tone correction you must choose the “auto settings“, otherwise choose the needed settings in the lower part of the dialog.
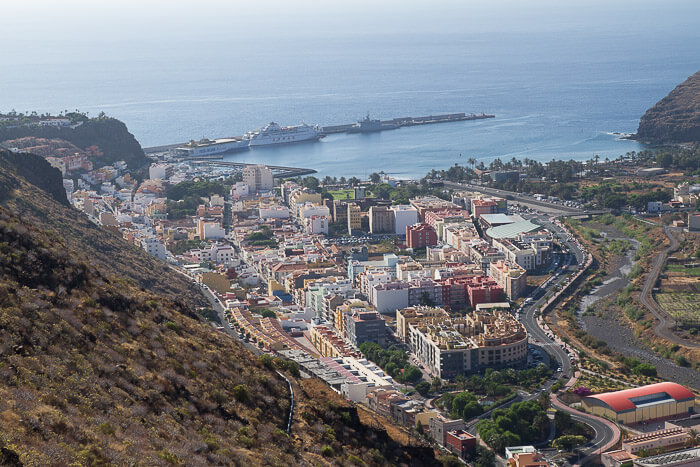
And this is the result:

But could define ourself a preset which changes the different values a lot more, like takeing down the highlights, bringing up the shadows and maybe putting a little bit of saturation and dynamic.
In the comparism view of the develop module this could look like this:
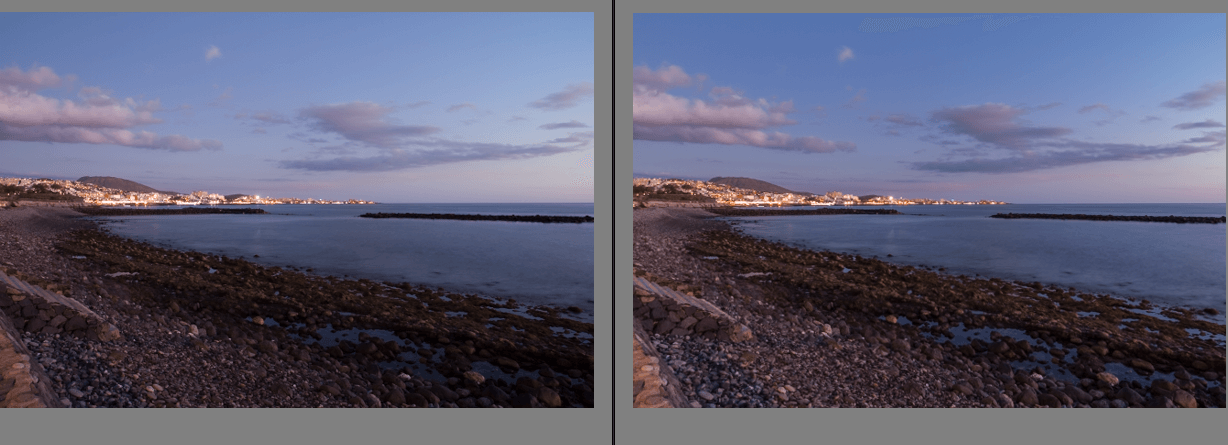
This result is not final but a good starting point for further image processing.
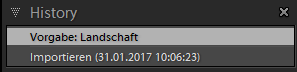
The history
Lightroom stores every development step and every export in to the history. Because this is done in clear text this is the main reason the catalog increases in size pretty fast. For different developement steps normally this looks like this:
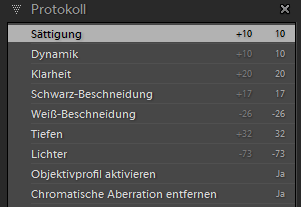
Using presets all entries are shortened to the usage of that particular preset:
 Using presets as a starting point for further image processing this shouldn’t be a problem.
Conclusion
I mainly use prestes during import, but for lens corrections only. Other presets for b/w and extreme high contrast are used very seldom Do you use presets as a starting point or for special effects?
ciao tuxoche

