New “old” server with the Jonsbo N5 housing
After almost 11 years and due to a hardware error, it was simply time to rebuild the server. Here are my experiences
Introduction
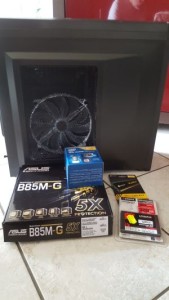
My self-built Linux server, which was first operated with Debian and later with OpenMediaVault, has already several years behind it. Due to a hardware failure, I rebuilt the server from scratch 11 years ago, in 2015. This included a new housing, then from Corsair, a new motherboard and of course power supplies and other small parts. In the meantime there were some changes, for example to the file system ZFS and a change of the motherboard with an Intel processor I3-10.400.
A few weeks ago, Linux reported to me in the log files that there was probably a correctable error on the PC-I-Slot 3 on the motherboard. But there were also some failures that the entire system either could not be woken up via WOL or if then did not switch through cleanly. That was the alarm sign for me, after 11 years I wanted to rebuild the server cleanly from scratch.
I also did video about my experiences and results with the new server:
The research
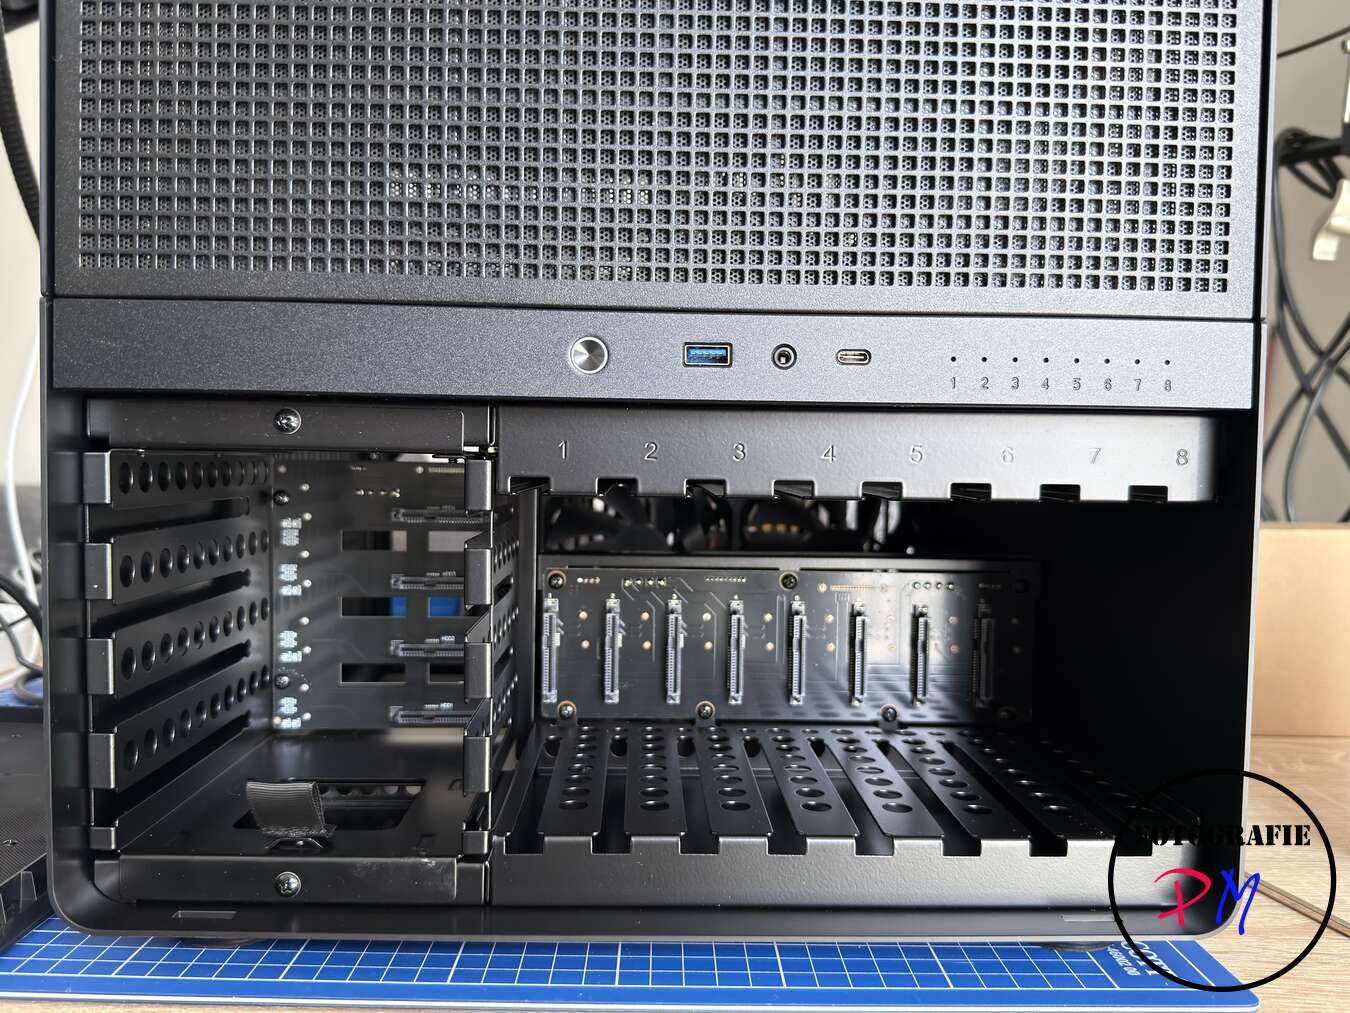
After some research, I finally decided on the Jonsbo N5 case. It has twelve slots for hard drives and should be enough for the future. Due to the housing dimensions, it was also more convenient, as a normal ATX motherboard could also be used here, which ensures more flexibility, especially with the PC-I slots and the SATA ports. The Jonsbo N5 case is relatively large and bulky compared to a commercial NAS case, but offers enough space to accommodate an ATX motherboard here, with all wiring, but the flexibility in choosing the motherboard was ideal.
The motherboard
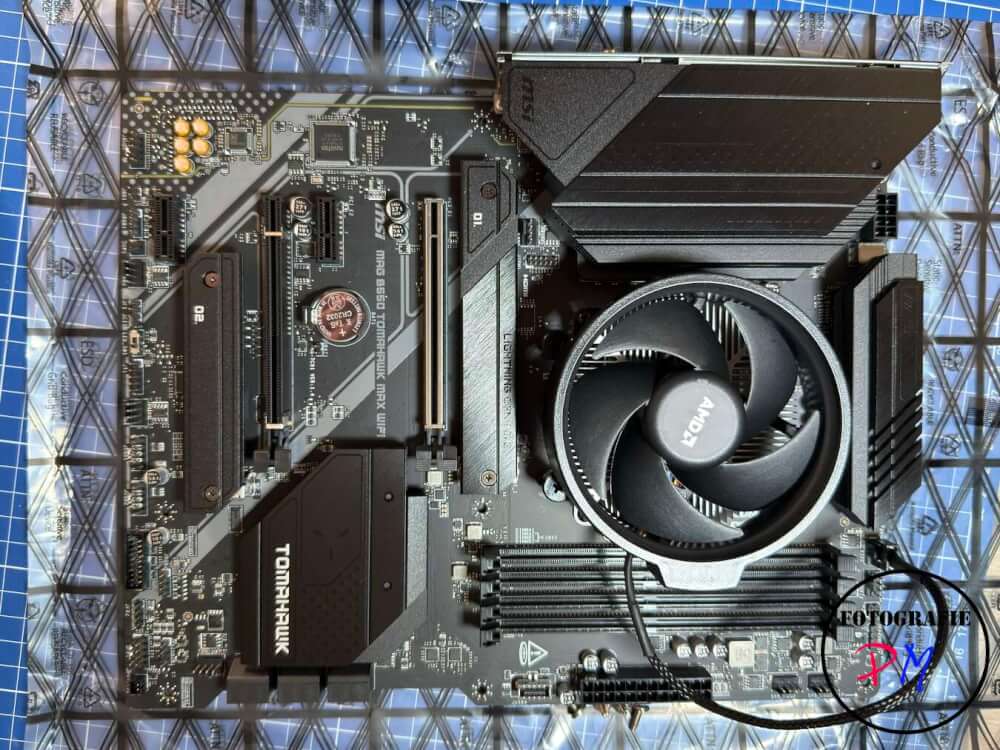
The selection of the motherboard was a little limited because I wanted to continue using my RAM from the old device due to the currently very high RAM prices and it is still DDR4. After all, it is an MSI Tomahawk motherboard that can be equipped with up to 128 GB of RAM and also has six SATA pins. This time I tried it with an AMD Ryzen CPU 5 5600CT, which sometimes promises more cores, i.e. higher performance, despite lower current consumption.
The structure
The construction of the new server with the motherboard was actually problem-free, considering that you first lay the SATA connectors or their wiring in the case and bring them up so that they can be connected to the motherboard there.
I retrofitted another 4 SATA ports with an additional PCI carter, so that I could then install the SSD, which is used to start the system, at the top of the case.
Other NAS operating systems
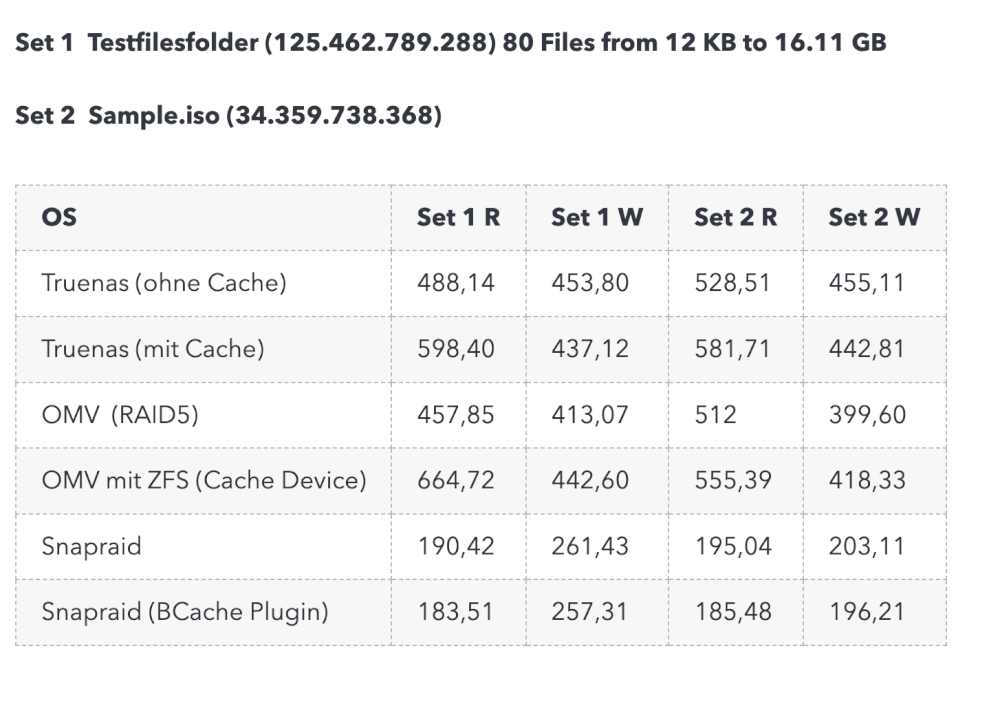
But I took the opportunity and performed several tests on the system with different NAS operating systems before my old system was finally moved. The last test I carried out was carried out only on virtual machines three years ago. This gives an impression of the installation, user-friendliness and so on of the different systems. But when measuring the speed, this should cause problems with regard to comparability. That’s why I tried different operating systems one after the other and measured the speed with a 10 GB network card. You can see the measurement results below.
Final setup
After the tests, I stayed with OpenMediaVault and the ZFS file system, also because the other systems hardly bring caching options and so on. Where you have to pay attention to it now and I have noticed that. During assembly, the ventilation situation of the hard drives. Here you have to know that the hard disk space in the lower part of the project is divided in two, so to speak, namely once for eight hard disks vertically, which sit directly in front of ventilation, so that there is a better airflow here. And four more hard drives that can be installed lying in another compartment. With the large Exos hard drives, which really reach the maximum height for 3.5 inch hard drives, this leads to the fact that the space between two hard drives is relatively tight. And since there is no dedicated fan from this compartment, this has led to the fact that these hard drives have increased temperatures here, especially when data backups have been carried out.
I then reworked that again later and placed these hard drives of the former ZFS in the ventilated part for the hard drives. In the other part I have now installed the four terabyte hard drives from my old wet. They are much thinner in terms of height, so that there is a better air flow even without dedicated ventilation and the hard drives do not get so warm anyway.
Snapraid

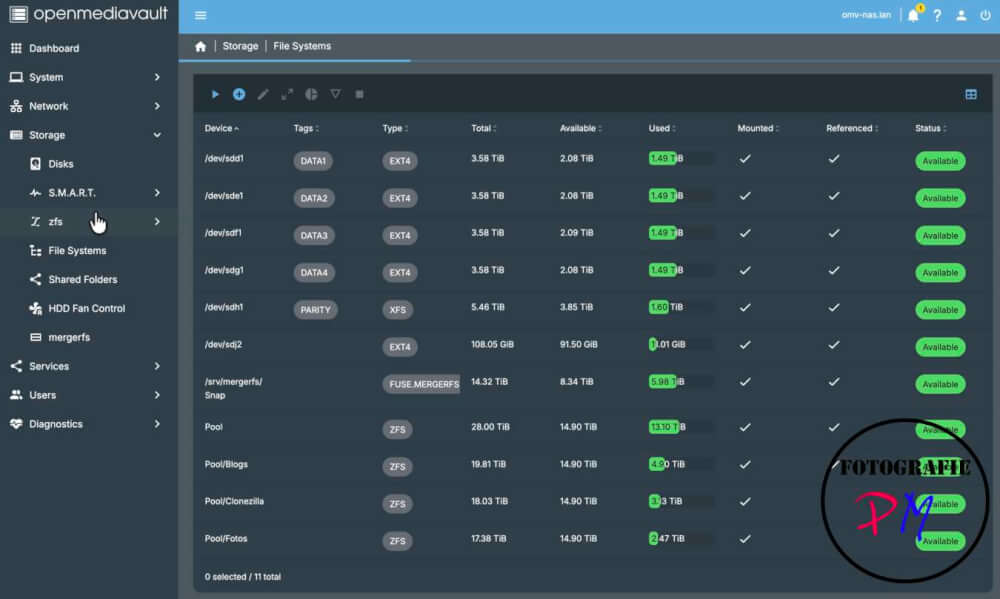
Here, however, I decided to build a snapraid, as I had before. Since I could use the total 4 × 4 terabyte hard drives here and could install an existing 6 terabyte disk as a parity disk. Data is stored here, which essentially no longer changes. These are in particular, for example, the video projects for YouTube. If these are now stored on this RAID to write the Perity, a corresponding script is called here every time a reboot, which updates the parity if necessary for newly added or deleted files.
As soon as a video project is completed with the upload to Youtube, the project files move from the ZFS RAID to the Snparid, where they are archived. The same applies to ISO files or images created with Clonezilla and very rarely change.
Capacity
A total of 9 HDDs, 4×16 TB are now installed in a RAID-Z2 and 4×4 TB + the already mentioned Paritiy disk with a total of 16 TB for the Snapraid. The 128Gb SSD for starting the Openmedaivault installation is only mentioned for the sake of completeness.
Power consumption
Power consumption is also limited. I once measured the different states (idle, normal and load) here.
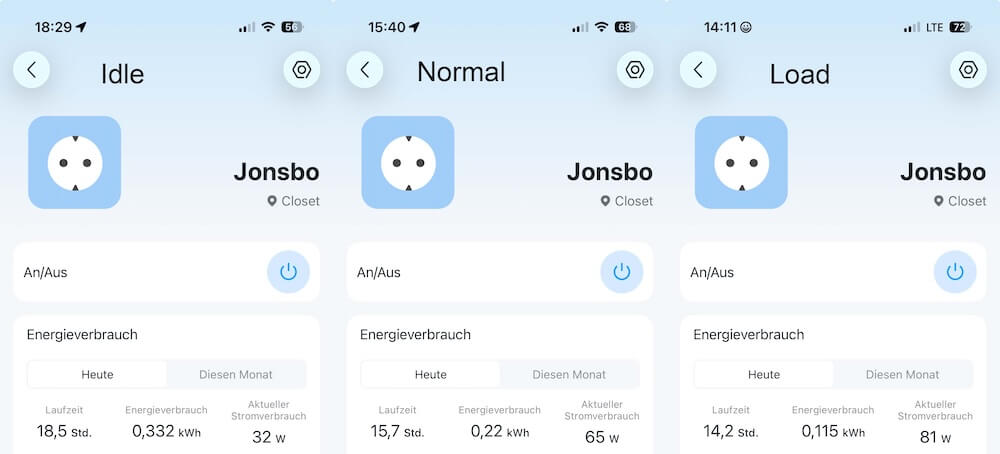
However, I must clarify that the 81 W under load only the 4×16 TB hard drives during a backup. The Snapr-Raid Array is then not under load.
Conclusion
After 8 months in which I drive the new system, I can only say that the new construction was worth it.


