DXO PureRAW 6 – not only for denoising images
I hadn’t dealt with DXO PureRAW for a long time. The last time I worked more intensively with DXO or PhotoLab was almost six years ago. I was all the more interested when DXO came up to me and offered me the opportunity to try PureRAW 6.
Read more: DXO PureRAW 6 – not only for denoising imagesIntroduction

With DXO PureRAW, you first think about the topic of noise extraction. And that’s exactly what the software is known for. However, I found in my first tests that PureRAW can be more than just a tool for me to make strongly noisy photos reasonably presentable again.
The program is of course available for Windows as well as for MacOS. The installation on my MacBook was done quickly and went without problems.
I also recorded a video:
Integration Finder/Lightroom
DXO also sets up the corresponding integrations. PureRAW can be used both directly from the Finder and from Lightroom Classic.
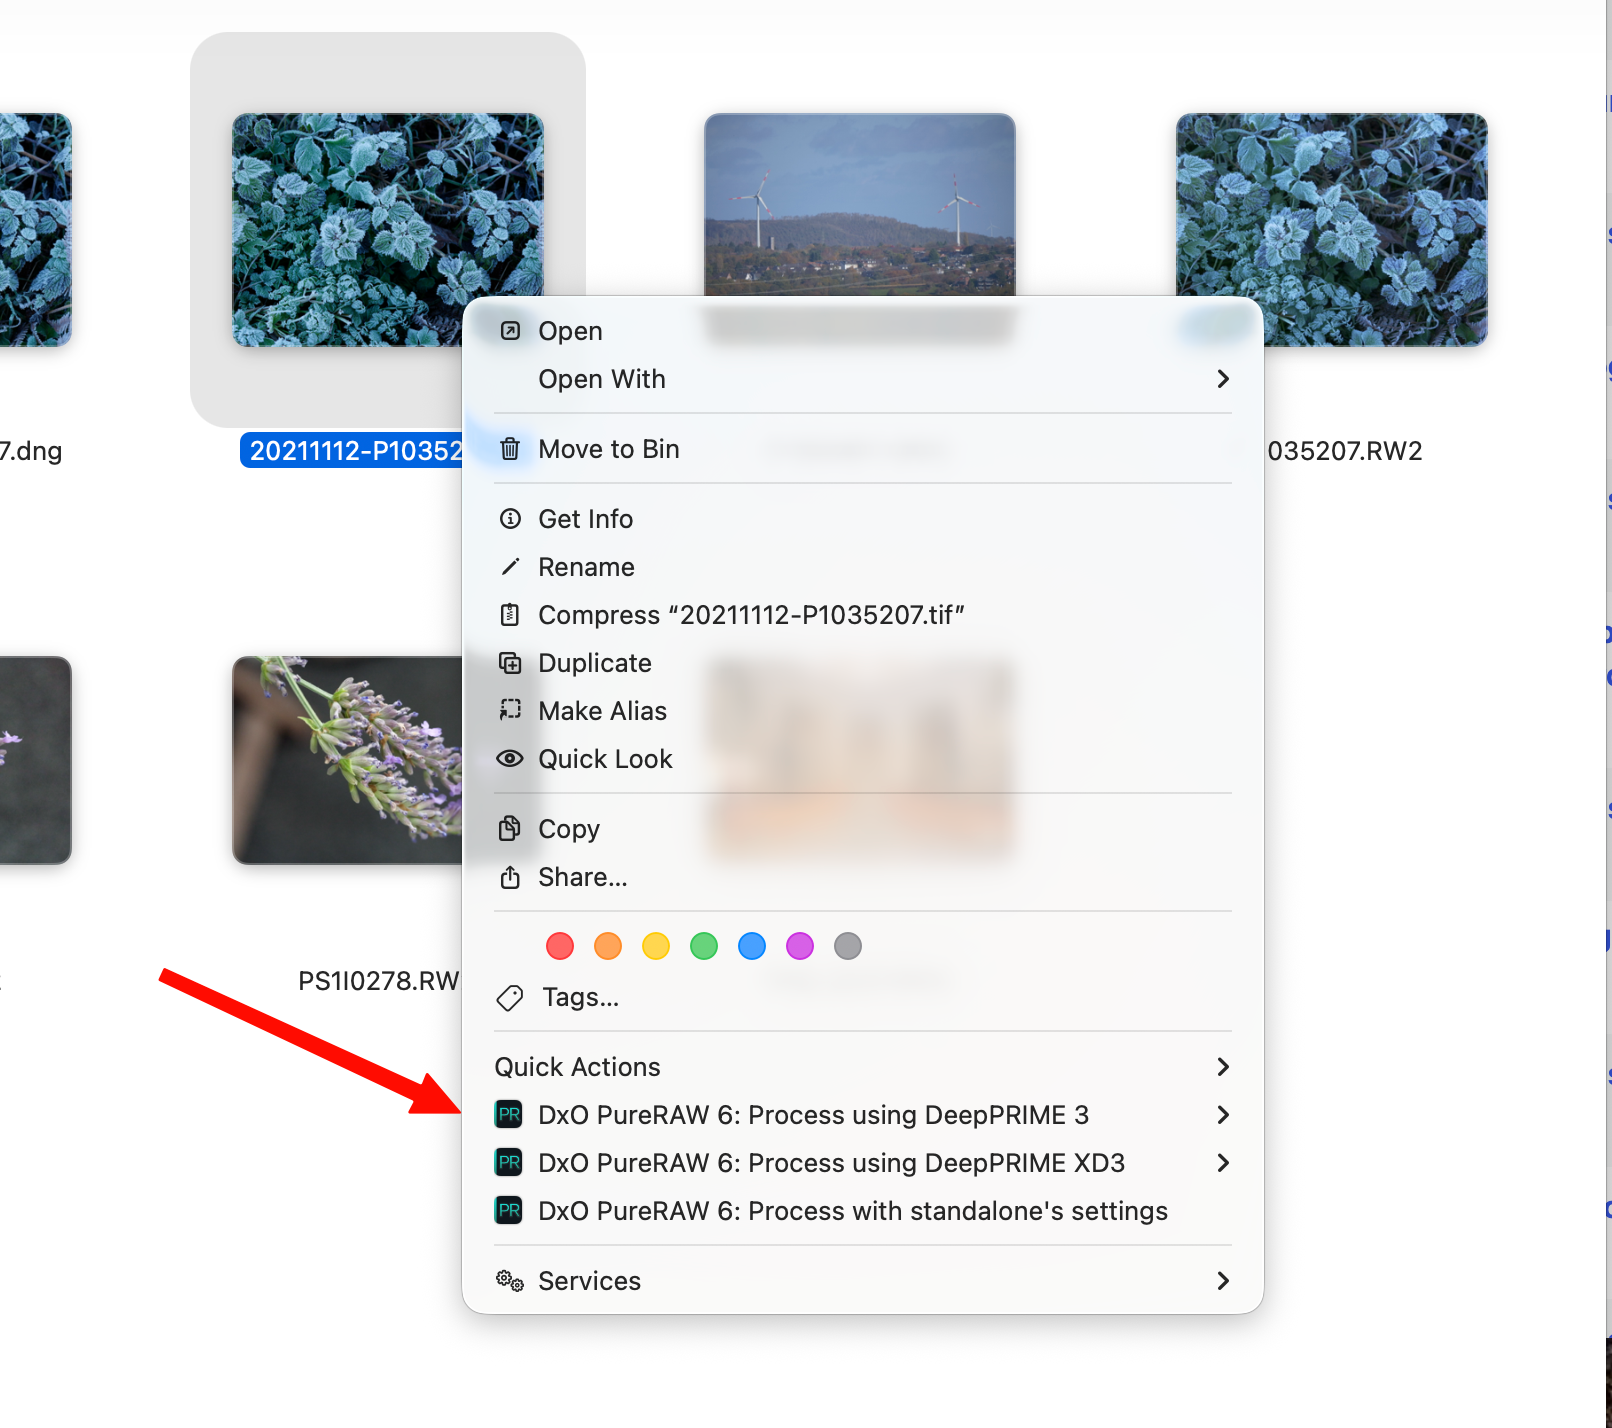
I find the finder integration especially practical. You can transfer a RAW file directly from any folder by right-clicking to PureRAW and have it processed there. So you don’t necessarily have to open Lightroom first and initiate a corresponding export.
For my normal workflow, however, Lightroom integration is more interesting. A RAW file can be passed directly from Lightroom to PureRAW. After processing, the resulting file is automatically imported back into Lightroom. The whole thing is therefore relatively uncomplicated and can be integrated into an existing workflow without major changes.
Isure/Settings
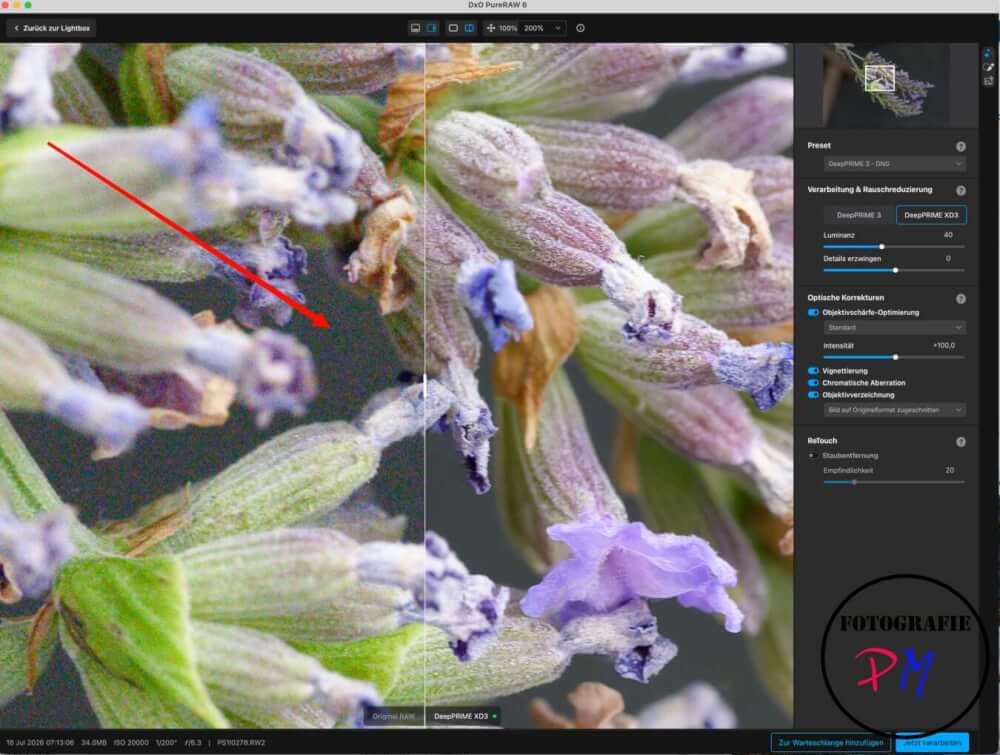
With the actual settings, PureRAW is pleasantly restrained. Essentially, the two models DeepPRIME 3 and DeepPRIME XD3 are available. DeepPRIME XD3 is the more powerful variant and, according to my previous impression, also delivers the best results. Of course, the processing takes a little longer.
There are also other ways to intervene manually in the processing. However, I have not yet dealt with this more intensively. For my first tests, I first simply worked with the default settings suggested by PureRAW.
When exporting, you then have various options. In addition to DNG, TIFF with 8 or 16 bit and JPEG are also available. For further processing, I would personally prefer the 16-bit variant if a TIFF is to be used. However, I find the DNG workflow more interesting, because I can continue to edit the file in Lightroom very flexibly afterwards.
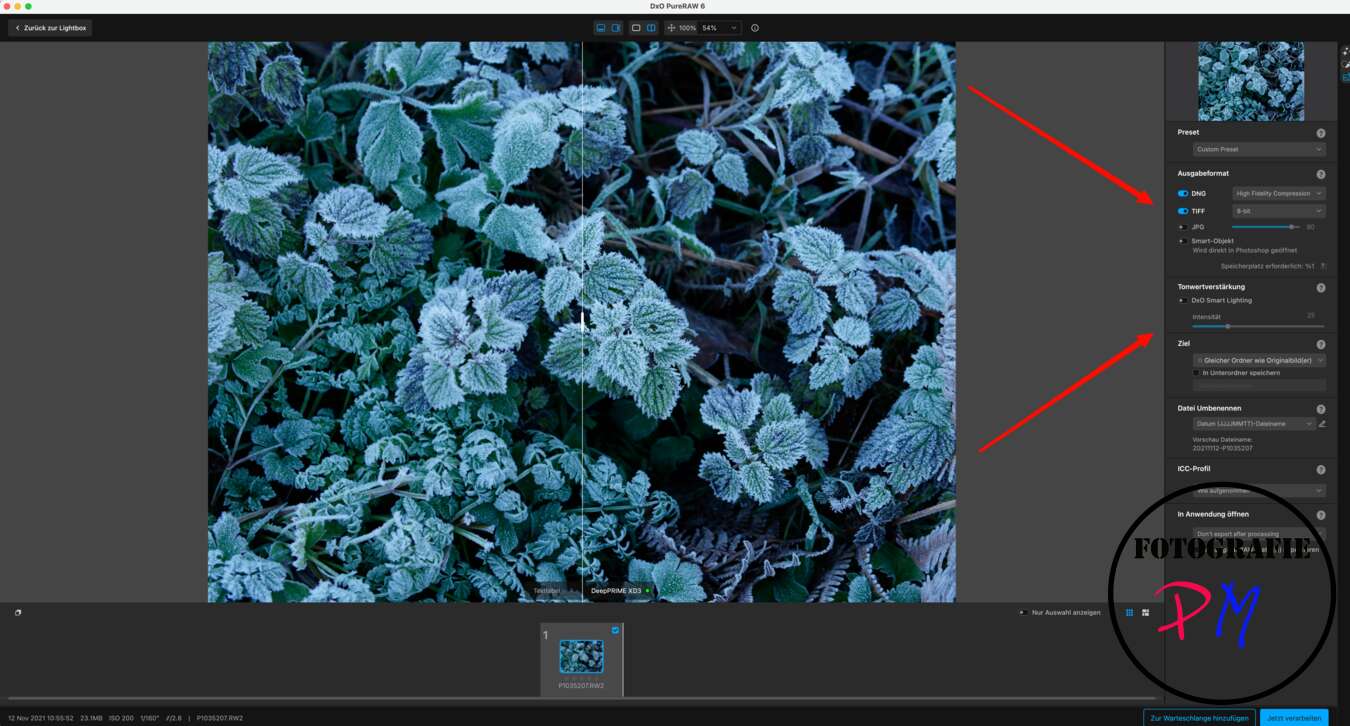
The compressed DNG files save on average a little more than half in space, so that the uncompressed files can be 3 times as large as the original RAW file.
The process is quickly explained: I select a RAW file in Lightroom, export it to PureRAW and have it processed there. Depending on the computer, it only takes a few seconds until the finished DNG file is available again in Lightroom.
I can then continue working normally there.
I would still always keep the original RAW file. PureRAW finally creates a new, optimized version and does not replace the original. For me, the original therefore still belongs in the archive.
Results
Of course, it is interesting to ask what PureRAW actually does with the pictures. Among other things, I tried a macro shot with the 100 mm macro lens from Panasonic. And with this shot, I didn’t exactly make it easy for PureRAW: ISO 51,200.
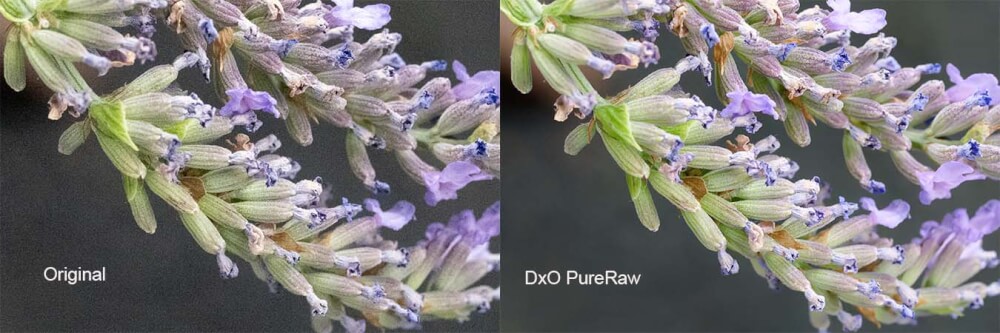
Of course, you can’t expect miracles with such an ISO setting. Even after processing, the picture is not suddenly completely noise-free. But the difference is still quite clear.
The noise is reduced so far that you can actually work with the image. And that is exactly the decisive point for me. It is not necessarily about getting a completely noise-free picture. It is much more important that the recording remains usable despite the high ISO setting.
I noticed the preservation of the fine details particularly positive. Especially with a macro shot, it would be fatal if the noise reduction simply filters away all small structures. With the flowers, however, these details are surprisingly well preserved. The result does not look like an artificially smoothed image.
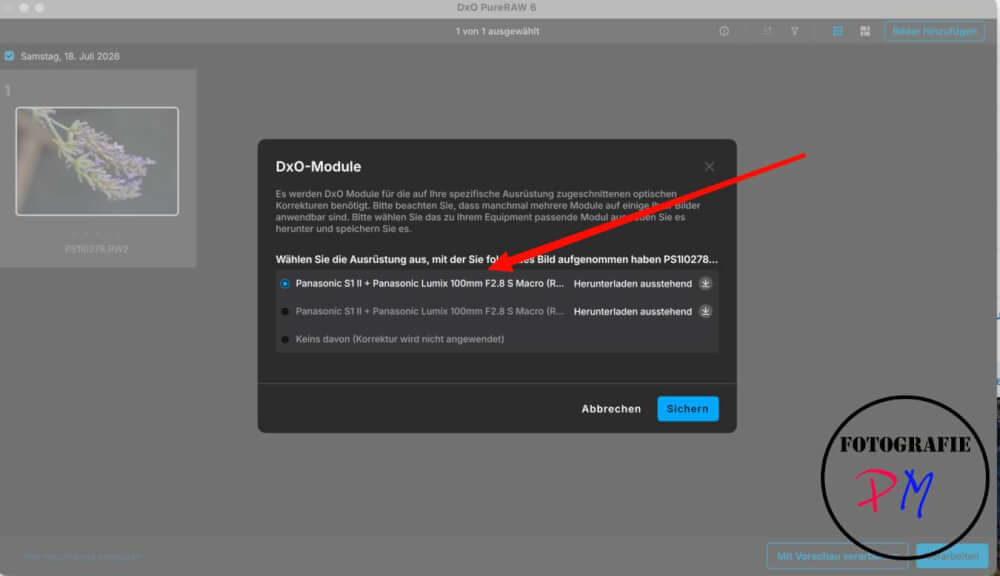
Of course, it also plays a role that DXO uses appropriate correction data for the different combinations of camera and lens. These include, for example, corrections for vignettes or chromatic aberrations. The required data is downloaded during the first processing of a corresponding combination.
And exactly at this point PureRAW becomes interesting for me even apart from extreme ISO values. I therefore tried another recording, which was only taken with ISO 400. So this was not about saving a very noisy photo. Nevertheless, I could notice a difference after processing.
Especially in the close-up, the details seemed clearer and sharper than in the original file. This is quite interesting for me, because the benefit of PureRAW is not limited exclusively to recordings with high ISO values.
This makes DXO PureRAW 6 more than just a program to get out of noise for me. Of course, not every Lightroom user also needs PureRAW. If you are satisfied with your previous RAW converter and have no problems with the results, you will probably not see a compelling reason for another processing step.
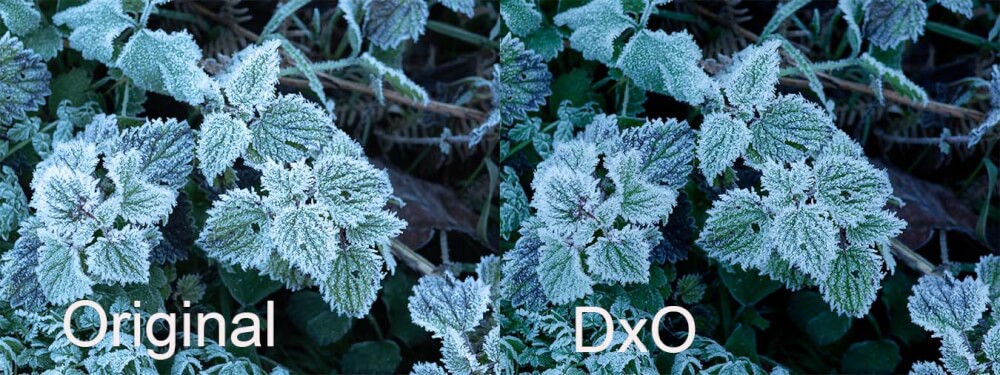
PureRAW is especially interesting for me when the recording was made under difficult conditions. High ISO values are certainly the most obvious example here. But even with normal ISO settings, the additional optimization can be interesting when it comes to extracting as many details as possible from a shot.
Conclusion
DxO PureRaw is really the standard in terms of image de-noise, but also shots with lower ISO can benefit from editing in DxO Pureraw as the first step. Seamless integration makes use easy and fast.
If you are convinced now, you can save 15% on every tool in the DxO shop with the code TUXOCHE, but only for new purchases and not for upgrades.
ciao tuxoche


