Manage high ISO noise
Manage high ISO noise is a continuation of the post “Why always ISO100”, which told you to be more courageous on your ISO settings.
Introduction
The blog post confirmed the rule getting more noise in your images with higher ISO settings, but also stated that the type of images and your personal taste matters a lot. Bascially large monochrome areas seem to be more noisy compared to more detailed areas of an image. With this knowledge you might even choose a higher ISO setting with a mFT camera.
Starting position
I took a pircture with my Lumix G81 at ISO 3.200 for testing purposes. Under normal circumstances an expsoure time of 1/250 sec. should have been enough, so the image could have been taken at ISO 400, but this time we want to see the noise in the image 😉
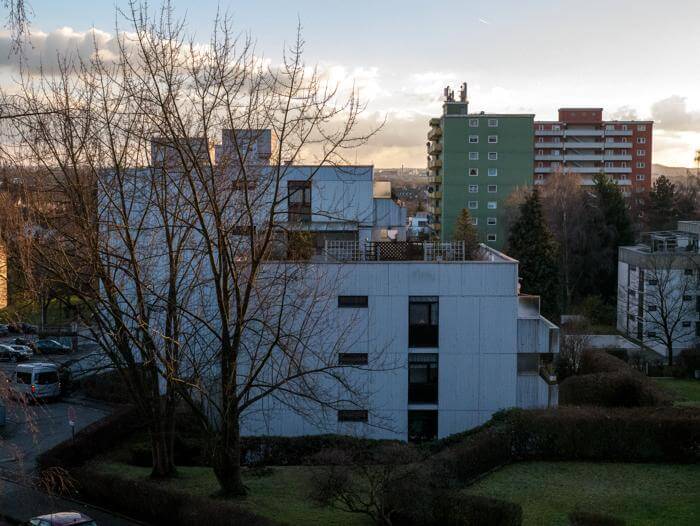
In Lightroom i took down the highlights, brightend up the shadows and leveled the image.
Reducing noise is always a compromise between noise and not loosing the details.
Lightroom
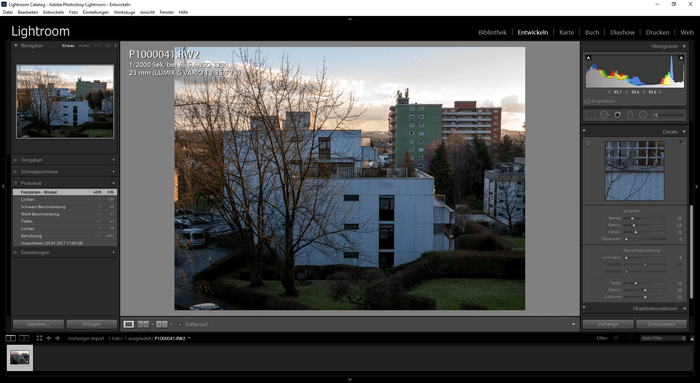 Lightroom as a very good RAW converter of course offers functions to reduce noise in an image. Noise reduction is seperated into luminance and color noise. There are no presets installed for noise reduction, but as a default Lightroom reduces color noise with a value of 25.
In the right panel you’ll see the 1005 view which can be moved to an area of an image you like. Either you control the effect by the rulers or you switch to the before/after comparism view.
Lightroom is able to define presets for noise reduction and on top link the value of the noise reduction to the ISO setting during import session.
Photoshop CC
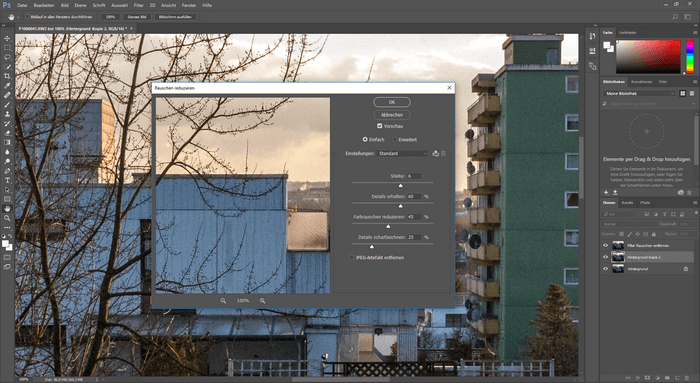 Photoshop offers noise reduction within the raw converter ACR. Since this is the same base as in Lightroom i didn’t use this option. I executed Photoshop CC in Lightroom with “Edit in” and first of all a 16 Bit Tiff file is generated.
After the image is visible in Photoshop my advcie is to copy the level first, before beginning to work on it. This makes it very simple to verify the effect just by switching off the visibility of the layer.
Photoshop offers 2 filters, one is “Reducing noise” and “Removing noise“. The later one allows you alter some settings while the first filter is apllied to the select layer.
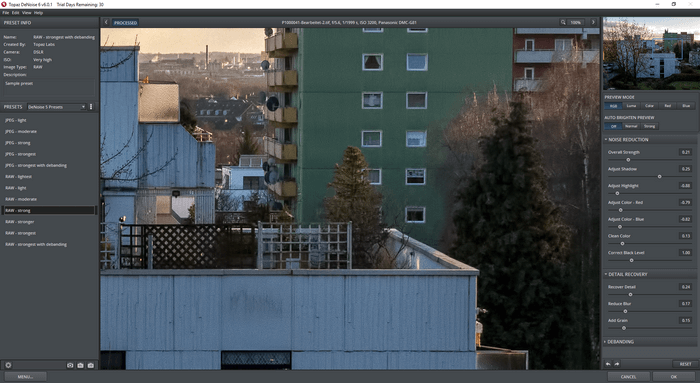
DFine2
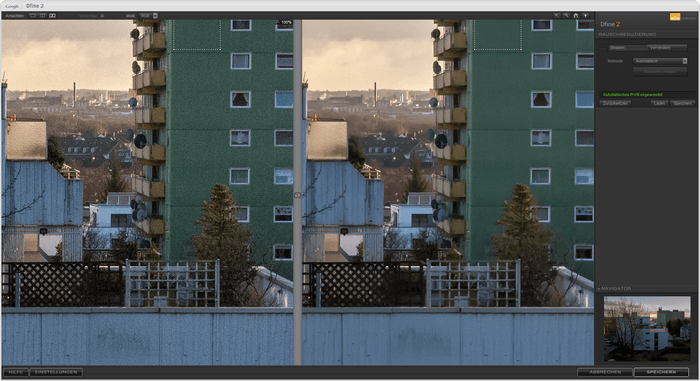 DFine2 is available free of charge as part of the Google Nik Collection with different tools, and is installed as an external editor in Lightroom or as a filter in Photoshop CC.
If used with a reaw file this file is converted to a 16Bit tiff with Lightroom settings file prior to edit the image with DFine 2.
The tool offers 2 modes, a measure mode and a noise reedcution mode. In measure mode the green square can be pointed to any area of the image, so for example the green area of the house in the background. Afterwards the noise redcution can be done automatically or you define the amount odf noise redcution manually.
Topaz Denoise
 To complete the list of tools at least more less i download a trial version from Denoise . This trial version is limited to a 30-days period and has no other limitations like reducing the size of the final image or adding watermarks to the final images.
Topasz just like Nik DFine2 is installed as an external editor for Lightroom or as a filter for Photoshop.
Like the other tools a 16Bit tiff file is generated first. The app offers a couple of presets for different noise reductions and you’re still able to control some settings manually.
Result
And here are the results of the different tools (just click for a full-size view)
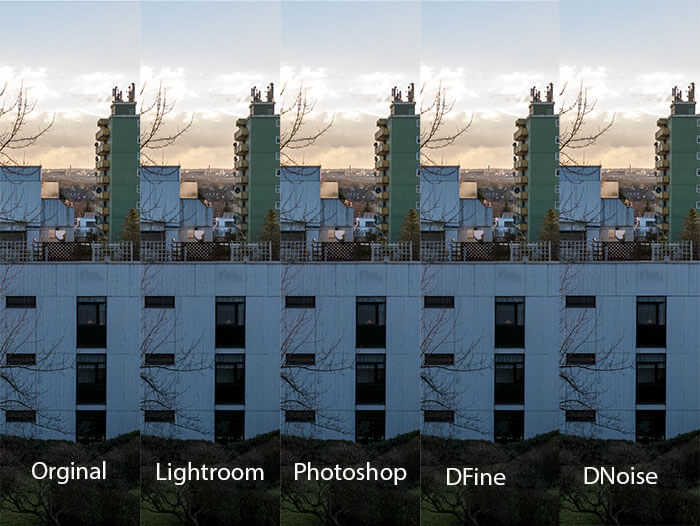
Conclusion
Measured at the fine details kept in the final image Topaz from DNoise is the winner, but the plugin costs 80,– € which is not too much if you need it often, like for concert or night captures. And since DNoise offers a trial version you can’t do anything wrong.
Both Lightroom and Google DFine2 do a good job. Using Photoshop i should have a little bit more to bring up more details, just like i did in Lightroom sample.
Which tool do you use and what are your experencies with high ISO images? Dop me a comment and i’m looking forward to your questions.
ciao tuxoche


