The 10GBit network experiment part 2
In the first part we had the basic things and also already the selection of a network card. In the 2nd part there are more hurdles.
The Asus XG C100c card
The card was actually easy to set up. In Openmediavault a driver from Aquantia was activated and so the card could be set up there as an additional network device.
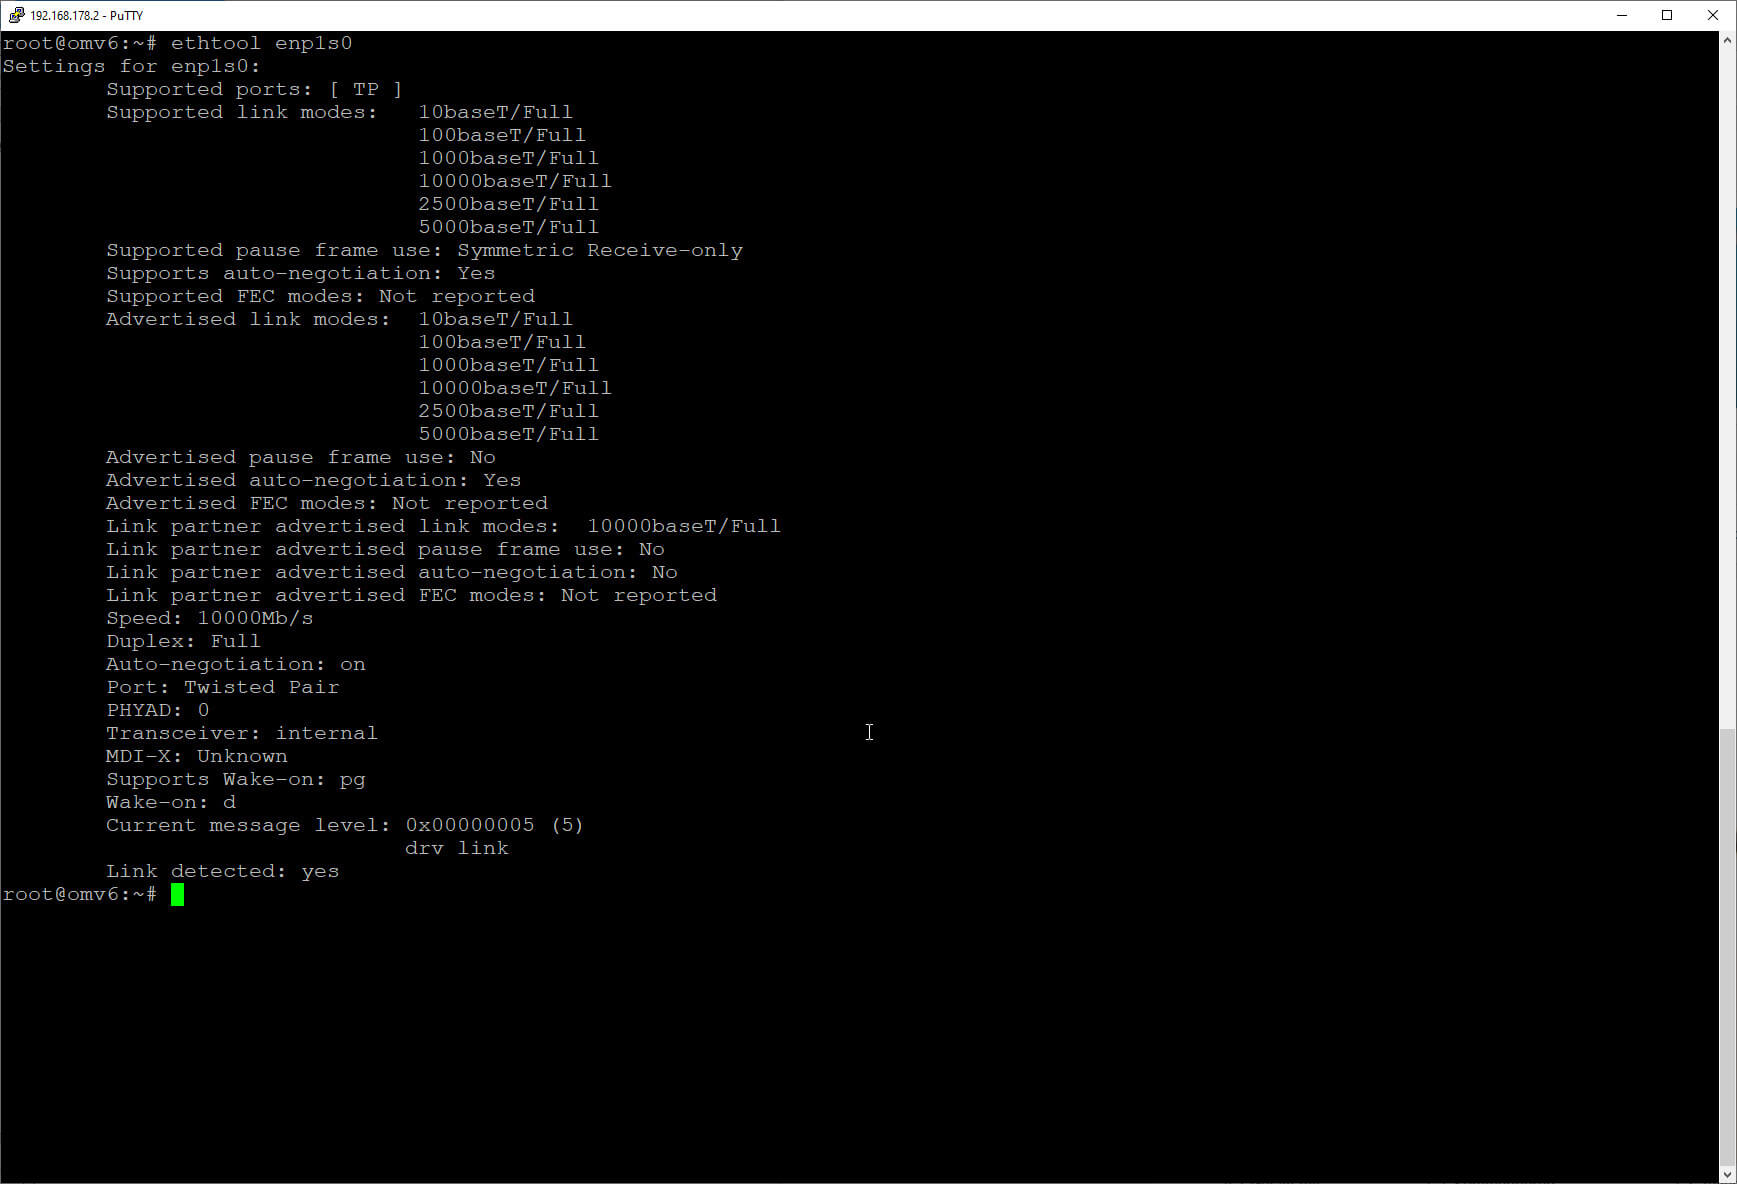
The card is also recognized without problems and also the maximum speed. The alternative speeds 5 GBit,2.5 G and 1 G are also recognized correctly under Linux.
The speed that can then be achieved is impressive at first. This is especially true if one is used to GB Ethernet speeds all the time. And if one activates the so-called jumbo frames (this is used to transfer larger network packets) the situation improves a bit, but from more than 1000MB/sec. one is still very far away.
But that would have been enough to edit e.g. video clips directly from the server without storing them locally in between.
And as reported in the first part, transfer rates collapse when the NAS actually has to write them to disk during transfer due to the size of the files.
The new motherboard
 The board of the NAS is a meanwhile 7 years old Asus B85M-G with an Intel Celeron G1820 on board. The board only provides PCI e 2.0 and the Celeron is of course no racehorse. However, the processor was sufficient for the previous GB Ethernet.
Therefore I decided to upgrade the mainboard and CPU. The choice fell on a MSI B-560M A Pro board. This is a mATX board with 6 SATA ports. This gives me the possibility to change to a smaller case later.
For the CPU I chose an I3-10105, which is one of the 10TH generation. It’s a CPU with a built in graphics unit, so the few card slots don’t have to be sacrificed for a graphics card.

The assembly went actually without problems and I could replace the board. After that the hard disks were connected and I could start Openmediavault without problems. This is mainly due to the fact that meanwhile under Linux probably all disks are mounted with a UUID and not with the name of the port.
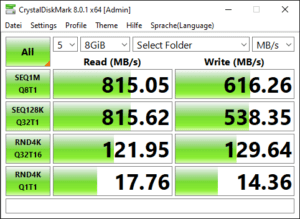
But you can imagine the disappointment when I found out that despite the new board under the CPU, the transfer rates hadn’t really changed, at least regarding the sequential reading and writing. But the speed of random accesses had practically doubled. The PCI card was in the  PCI e X16 slot, because others were too small and I also don’t need a graphics card.
But since the insufficient write speed was noticeable even when I wrote to a drive provided by a SATA SSD, the problem had to lie somewhere else.
However, there was a significant increase in the write and read rates for random accesses, while the rates for sequential accesses remained the same.
To measure the data transfer a bit more neutral, I downloaded the tool iperf3, which is available for nearly all operating systems, and measures the bare traffic without influence of hard disks, RAM and other things.
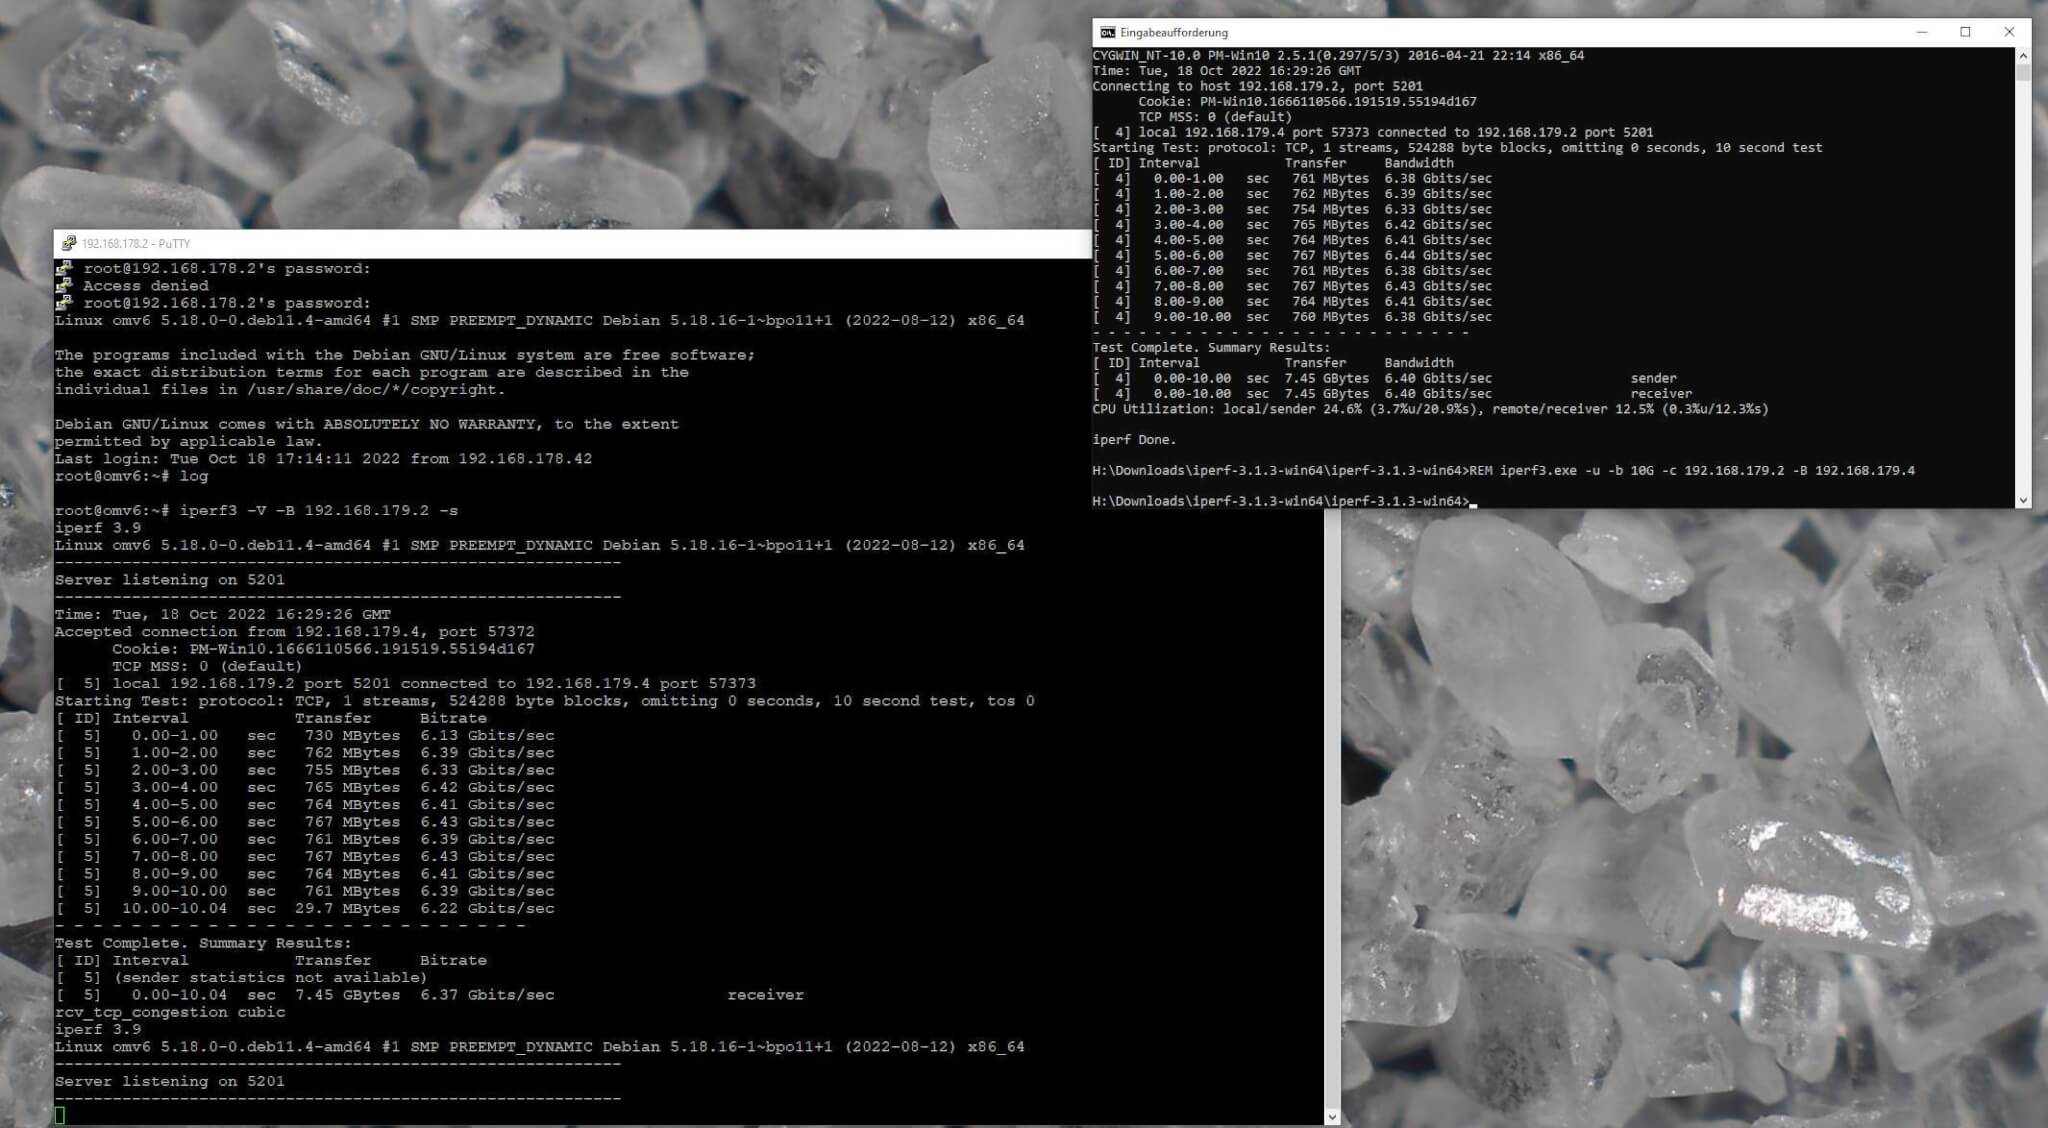
But here I could do what I wanted, more than 6-6,5 GBit/Sec were not in it, even if I started several iperf3 processes.
How I solved this, we can read in the 3rd part.
ciao tuxoche


Cheers!