HDR and DeGhosting
HDR and Deghosting, meaning to reduce or to remove ghost effects in the final HDR images occurs every time where objects, like people or clouds are moving between capturing the base images.
Base position
 On HDR images also exposure bracketing series of3,5 or even more images not seldomly it happens that objects like persons or clouds or other objects will move between the images. While merging the images this will cause problems in the final image leading into ghost effects where person for example will show up partial transparent or depending on the speed of the movement persons aill occur a couple oftimes in the final image. And even doing landscape photography will not ensure that there is no problem like that, depeding on the weather conditions clouds can move pretty fast.
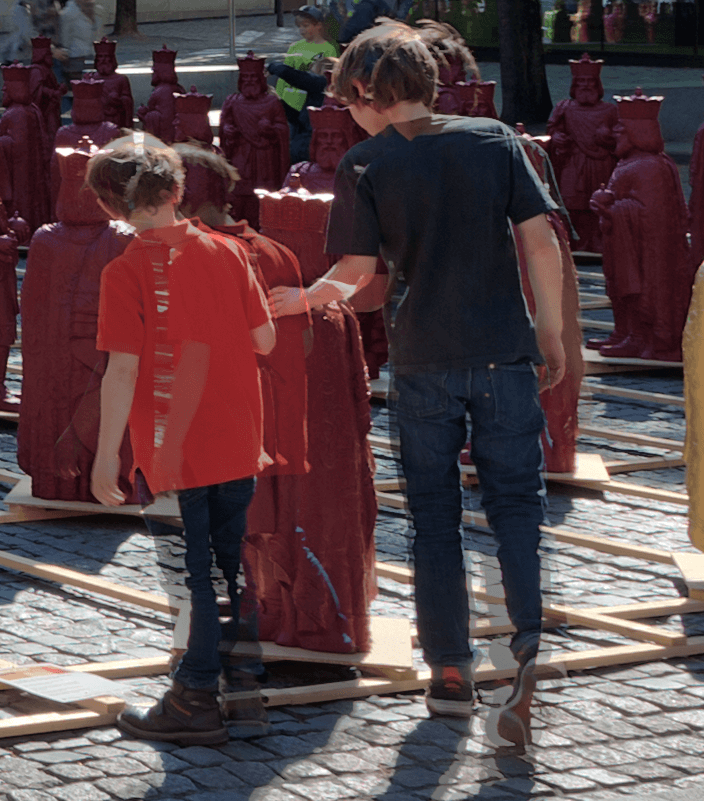
As an example i present you the crop of an example image where the persons moved just a little bit between the expsoure bracketing.
Now HDR software should offer tools to remove or at least to reduce the mentioned effects.
Execute Deghosting
The different tools like Lightroom Classic, Aurora HDR, Google Nik and Photomatix offer different options to handle ghost effects which also differ in the results.
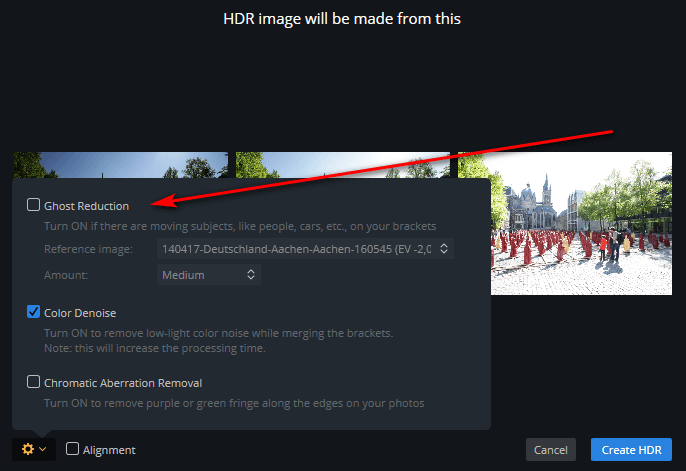
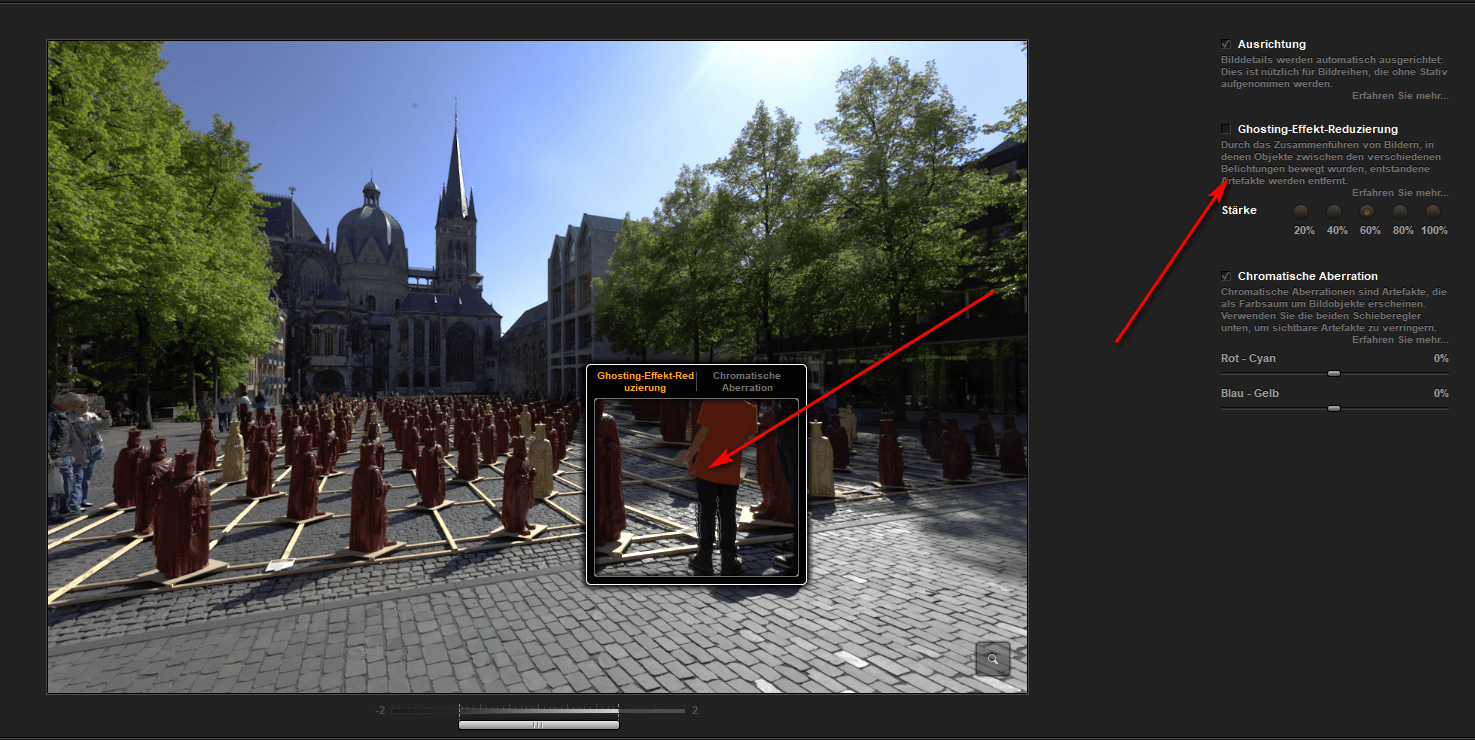
First of all lets take a look on Lightroom’s handling of deghosting:
As you can see in the screenshot the tool displays the areas where deghosting will be applied, but no further control is given to the user. The amout of deghosting has to estimated based on experience and might as well by trial and error.
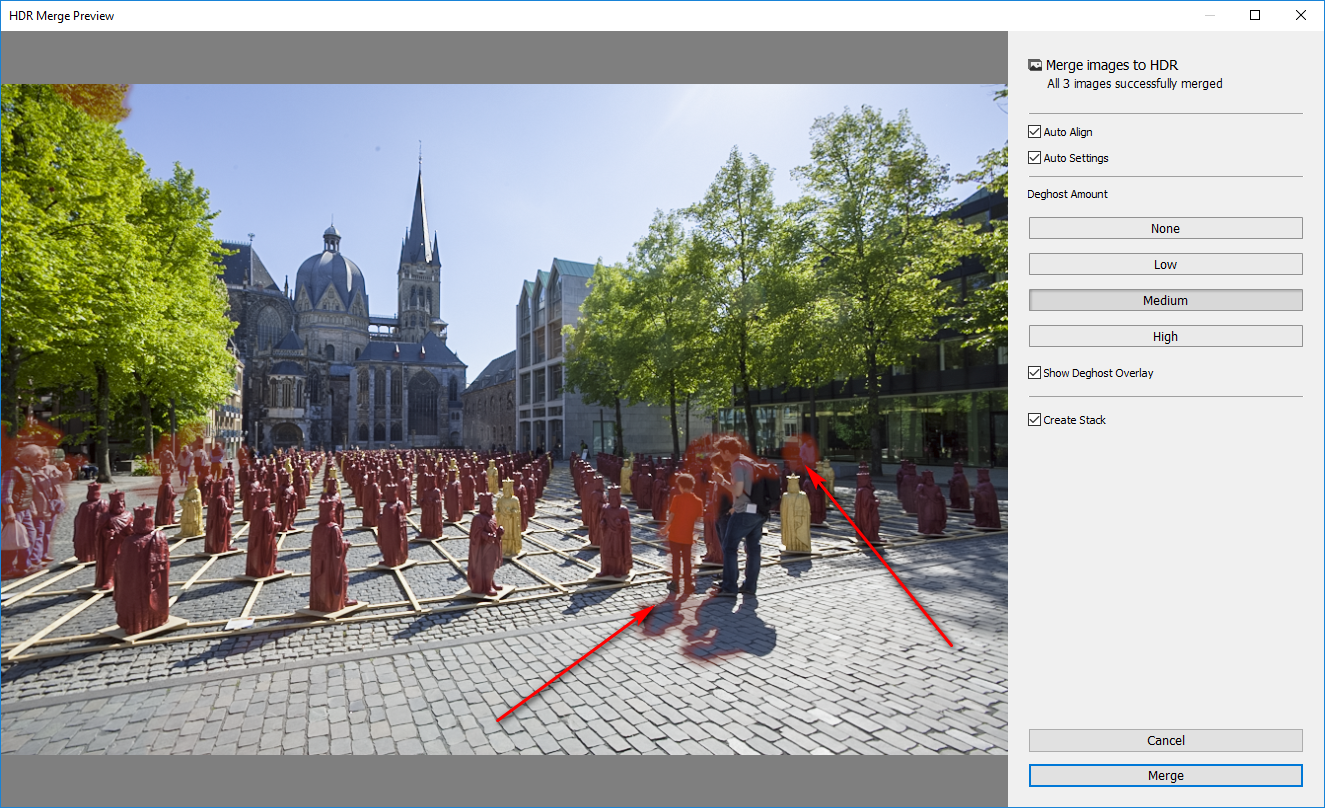
The controls in Aurora HDR are limited almost in the same way.
 Just as in Lightroom you have decide by your experience the amount of deghosting. But at least you can decide which of the HDR base image should be used for the deghosting. Aurora HDR 2018 takes the darkest image as a default while the new Aurora HDR 2019 takes the middle of the bracketing series. During the deghosting process those parts of the images which cause the ghosting effects will be taken out of the base image. If you choose the darkest image in the series this has to be brighten up and depending on your settings you’ll end up in having noise in the resulting image.
Google HDR Efex is a little bit better at this point, but just a little bit:
 In this tool a sort of preview is offered, but this preview is not precise enough and too small to judge the effect. On the other hand there is no opportunity to choose the base image for deghosting.
The best controls are implemented in Photomatix.
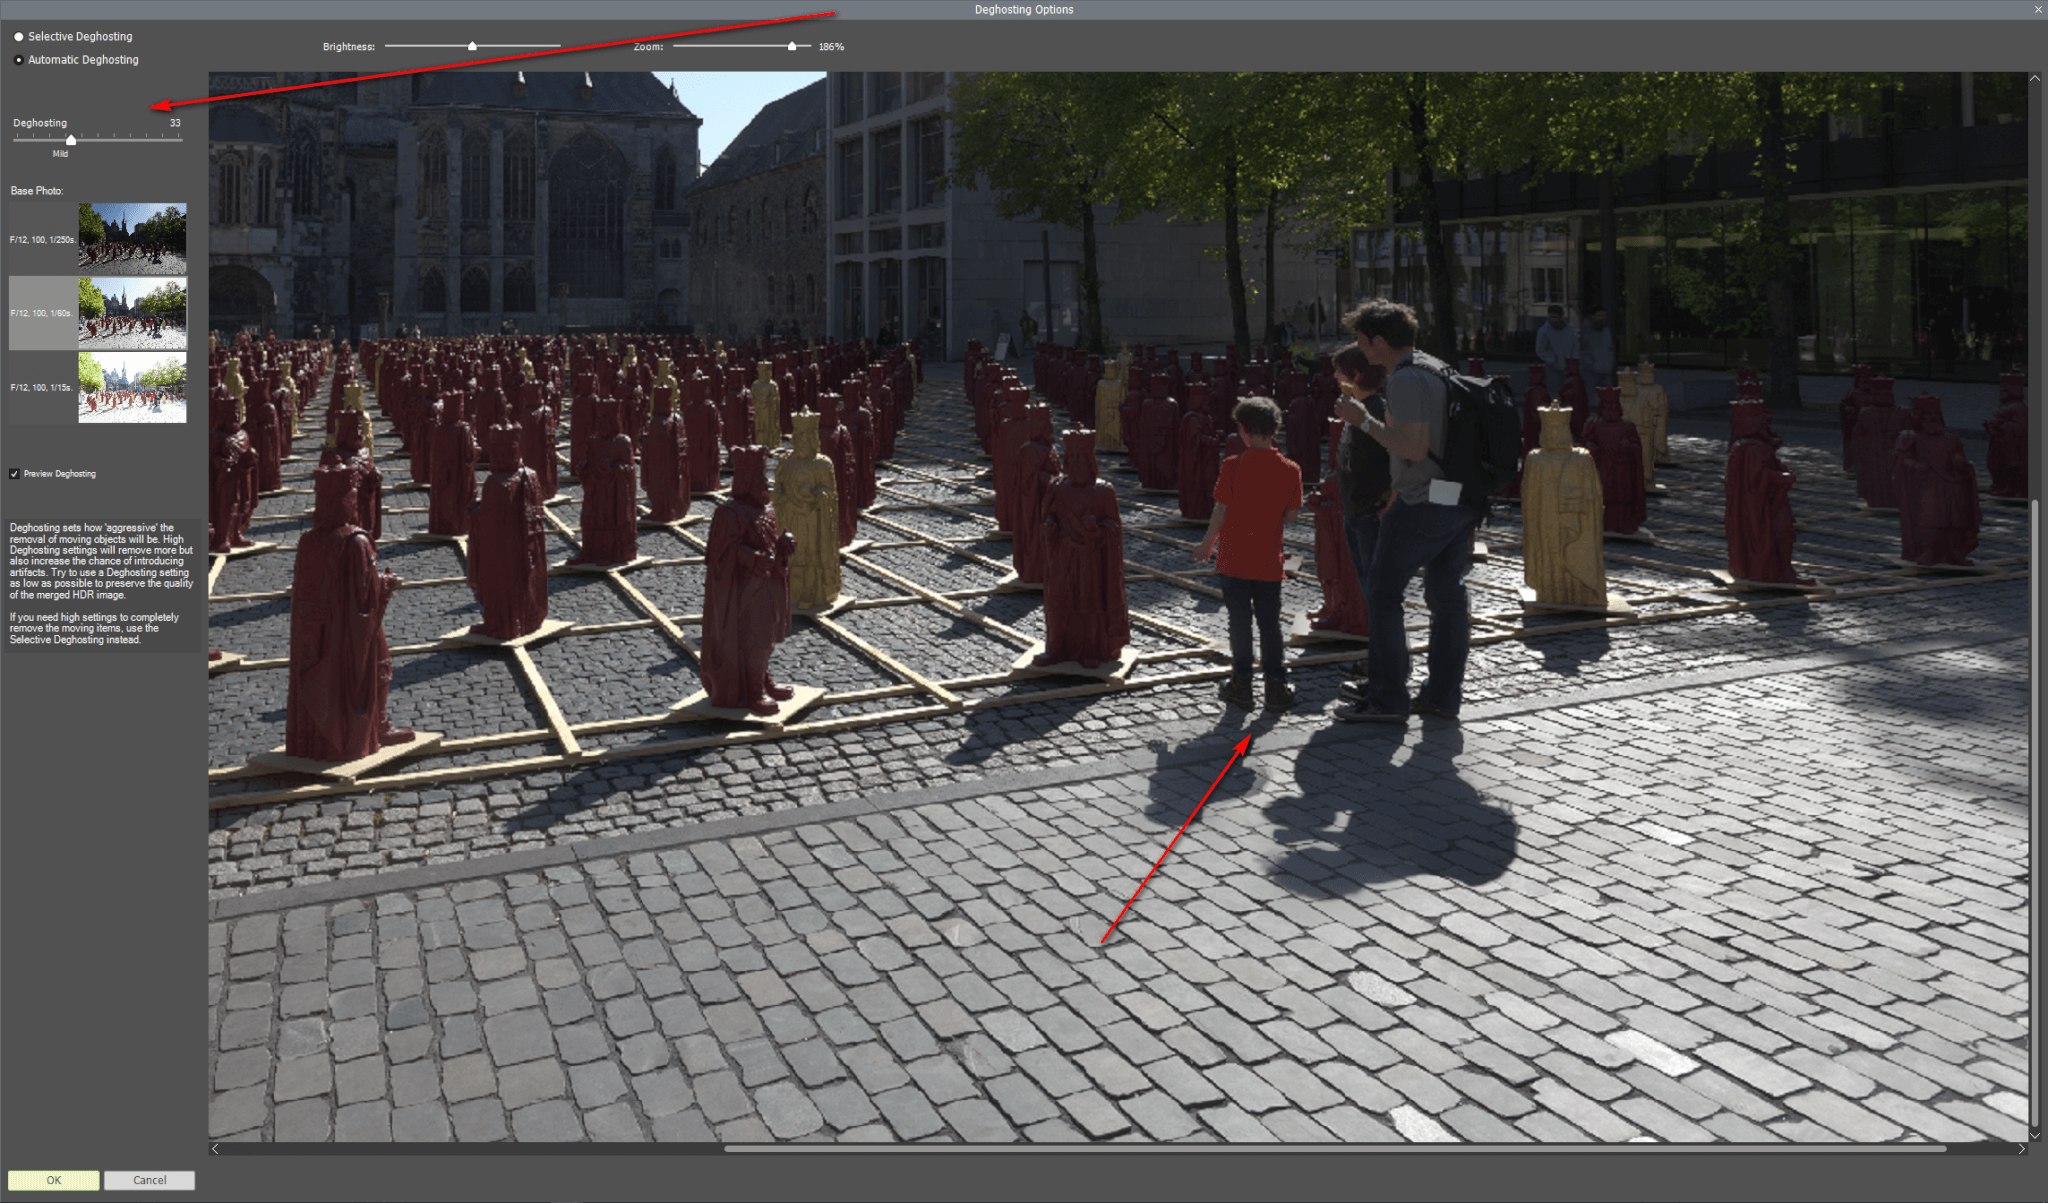
First of all you get a pretty accurate preview. You can choose the base image for the deghosting and you can control the amount aof the deghoting function. This is the first place for Photomatix in this comparism.
But with the other apps you can get very good results with the more or less automatic functions and sometimes even Photomatix sometimes fails to reduce ghost effects completely.
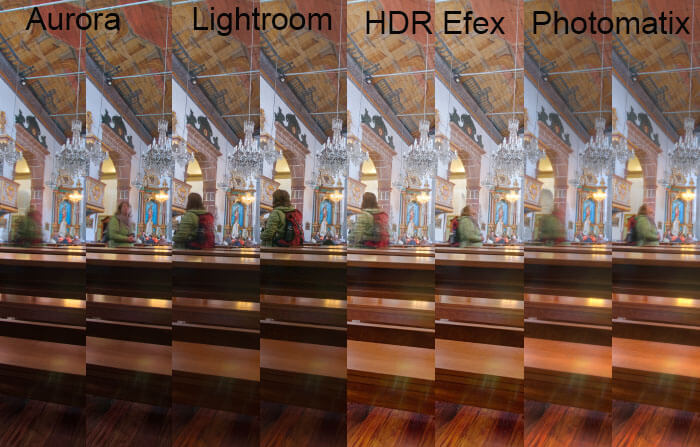
Comparism
Here is a side by side comparism with the different tools:
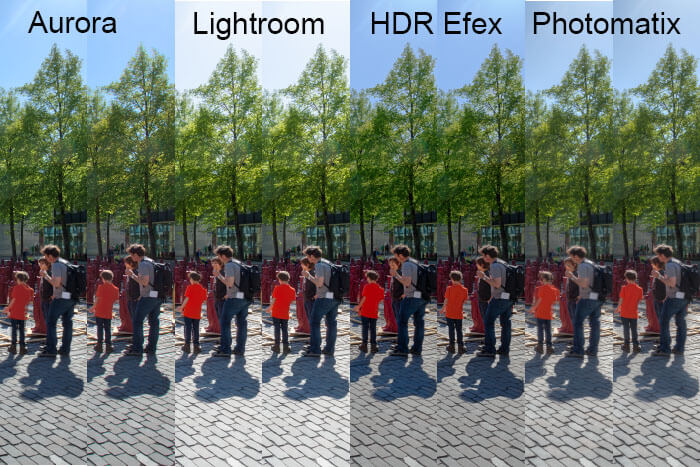
In the comparism image the first section is the result without any deghosting settings and the second section was done with deghoting set to medium. Rather typical is the comparism image from a church where there is no chance to avoid ghost effects.
Conclusion
As a conclusion i can state that Photomatix is the best tool, it offers a pretty precise preview, you can choose the base image for deghosting and you set the amount of the effect and judge it by the preview. On other hand the other tools and their more or less automatic routines will often get results which are good enough. But Photomatix takes first place in this comparism.
ciao tuxoche


