Timelapse recording technique
Timelapse video sequences are seen more and more, especially in advertisement movies. Depending on the motif this recording technique leads to fascenating (short) videos. A variant of the timelapse recording technique is the so called hyperlapse video, where the camera is moved during the shots.
Timelapse shots are regularly taken at a fixes time intervall. Assembling the single shots to a video with 24-25 frames per second gives the effect, that the sequences is shortend compared to real time.
Hyperlapse shots add a three diemsnional effect to such a video, since the camera is moved between every shot, either towards an object, away from it or surrounding the object. According to wikipedia the definitionis pretty new.
Lets go now to the technical aspect of timelapse photography. Any camera with an resolution above the standard HD format, that is at least 1920x1080px, is suited for timelapse photography, For hyperlapse shots resolution should be greater. So every reasonably new camera should be ok. The camera should be able to trigger a shot by itsself (like some Nikons) or with a cable release.
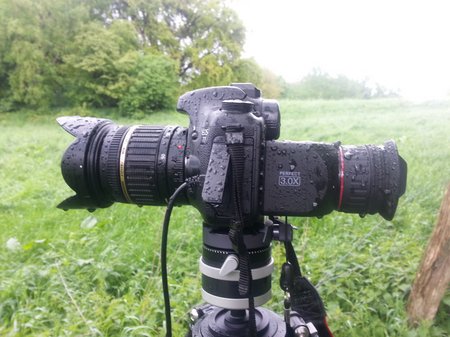
 Most of the time use my Canon 7d for timelapse shots, but sometimes i even use the 5D MK II. The shutters of those cameras should take 150.000 shots or even more, so a couple of timelapse sequences should be no problem. But do it on your own risk, it just could happen, that your camera wont make that much of shutter releases.
But if you keep your timelapse sequences relativly short, there should be no problem. Moving clouds or a burning candle maybe are interesting, but you should not exceed 30 sec. in the resulting video, maybe shorter, but this depends on the subject. Ok there maybe subjects that indeed require longer sequences. But any way, if you stay arround the 30 seconds in the resulting video, you only need arround 750 pictures to take, which isn’t that much.
 In addtion we need a steady tripod. I use the Manfrotto 055XPRO or the Feisol 3442. For timelapse shots the camera is leveld once tothe subject, so a special tripod head preference is not required. But should be fairly stable and the load capacity should be sufficient for your camera you use. The Feisol tripod is euipped with a Arca Swiss p0 head and the Manfrotto tripod uses a Benro B-3, heavy but stable.
Lets take a look to Hyperlapse pictures. I experienced that a ball head on the tripod is not only not required, but hindering. It’s quite cumbersome to level the subject after each shot. Myfirst Hyperlapse was done with a ball-head mounted on the tripod.
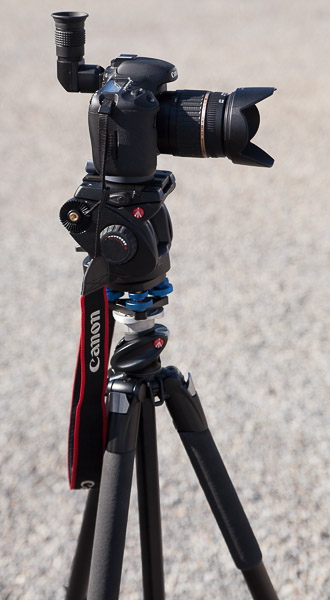
After this experience i use a video head, the Manfrotto 501HDV. Leveling is done through the Nodal Ninja EZ-Leveler II mounted below the video heat. This combination is nice and easy to handle. The tripod, mainly the Manfrotto, is only used with 2 leg segments. On top of that the EZ-Leveler and teh video head is mounted. The camera with an attached angle-finder is mounted on top. Thatis to my opinion the ideal setup to do hyperlapse shots.
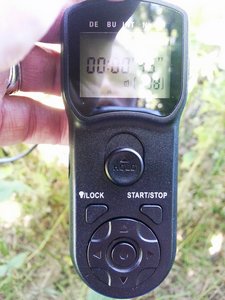
 The last one to talk about is an intervall timer, which are available pretty cheap by JJC. Depending on your budget you can choose either the wired oder the radio version. On the other hand you could use a smartphone or a tablet for exposure triggering. Personallyi use DSLRController for thisappliance. Teh advantage is the possible combination with the HDR feature.
Ok now just list the needed equipment:
steady tripod
cable release/smartphone
optional a leveler for the tripod head
So stepping into timelapse photography is not that expensive, and you’ll need a steady tripod anyway so it actually doesn’t count ;-.)
The actual timelpase recording technique is described quickly, setup the camera, connected the timer, choose a fitting intervall and start 😉 The right intervall is kind of tricky. As a basic rule the faster the event is in reality the shorter the intervall should be, e.g. fast moving clouds an intervall of 5 sec. between the exposures should be allright. But its only a basic rule, so in some situations a realy long intervall could be the right setting. There are no fixed rules, you must decide either by trial and error or by experience. I try to estimate the right intervall and sometimes i reduce the intervall furthermore, since in postprocessing i could decide to take opnly ervery seond picture for example.
Doing hyperlapse sequences is even more tricky. Since i don’t own a dolly, i try to move the tripod at an even distance between the shots. The distance for the toal hyperlapse is determined by your object and depends on the number of shots, you plan to take. You can estimate the distance or measure it by your footsteps, a smartphone with a caclukator app is sometimes helpfull 😉
To level the camera towards the object i remember distinctive lines/edge or something like that, which is then is brought into congruence with a line of the grid focusing screen or one of the AF points.
Taking hyperlapse pictures leave enough spaces arround your object. The crop to 16:9 video format can be controlles in Liveview, but enough space arround the object is almost essential, because it will shake. Taking 200-300 shots andn moving the tripod between each shot, it is almost not possible even though leveling distintive edges, you cannot a precise that the later result would not shake and therefor need some sort of stabilizing in the postprocessing.
Leaving enough space arrounds leads us to the focal length. There are advices on the net, not to use ultra wide angle lenses, but i cant share this advice, just take a look at my timelapse page.
No. 5 was taken with a 17mm lens on fullformat, no. 6 and 7 were taken with a Tokina 10-17mm Fish-Eye zoom using a crop format camera. But try it yourself 😉
That was the desciption how i do timelapse/hyperlapse sequences and the equipment, that i use. I hope you liked the article. If so leave a comment/suggestion or place any question.
ciao tuxoche


